Monday, November 29, 2021

Getting My DIY On With Homemade Burn Gel

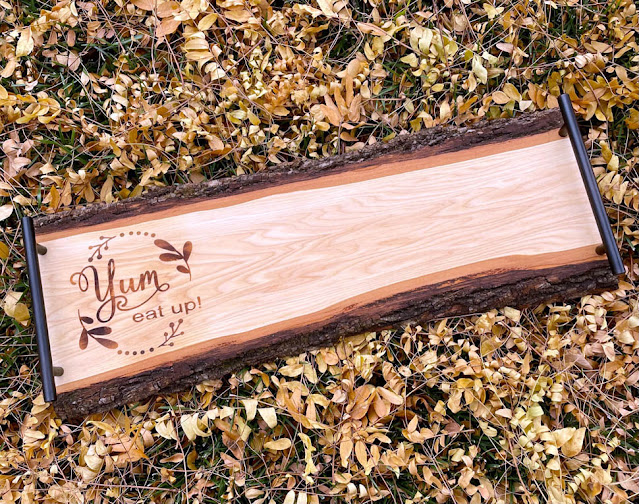
Charcuterie Board Designed & Made By Thistle Thicket Studio. www.thistlethicketstudio.com
For Thanksgiving this year, I joined the charcuterie craze and made my first charcuterie for our evening meal following the big Thanksgiving dinner at lunch. Of course, I had to make my own charcuterie boards and they turned out so well that I had to make one for my women's gift for our Christmas gift exchange. And since we can't all be together at Christmas, we had our gift exchange during our family Thanksgiving vacation so I can share my DIY gift early!

Charcuterie Board Designed & Made By Thistle Thicket Studio. www.thistlethicketstudio.com
I stumbled upon a video online that showed someone using a 'magic' gel that they painted a design on wood using a stencil then burned it into the wood using a heat gun. It looked like fun and oh-so-cool so, of course, I had to try it. I ended up spending more than $50 to make my $25-gift-exchange-limit gift but that was mostly for the heat gun that I didn't have.

Charcuterie Board Designed & Made By Thistle Thicket Studio. www.thistlethicketstudio.com
I made my stencils using my Silhouette Cameo 4, placed them on my slab of wood, and painted a thin (emphasis on thin!) layer of burn gel over the openings of the stencil. Then I removed the stencil and using the heat gun, blew hot air over the burn gel until it scorched the wood. Easy Peasy!

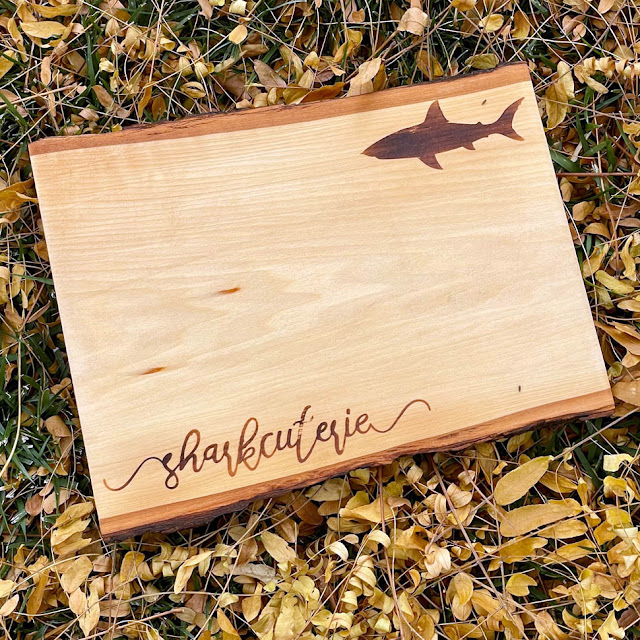
Charcuterie Board Designed & Made By Thistle Thicket Studio. www.thistlethicketstudio.com
I love how the 'k' blends in with the natural knots in the wood on this board!

So, without further ado, here is the 'magic' burn gel recipe:

DIY Wood Burning Gel

1 tablespoon Ammonium Chloride

8 teaspoons Thick It

1/2 cup warm water

2 drops yellow food coloring

Mix the ingredients in a glass jar. It will turn to a gel very quickly. The yellow food coloring is to help show where you have painted the gel. You can store the leftover gel in an airtight jar. 


Tips, Tricks and Other Info:

  • I bought my wood slabs at Hobby Lobby. I wanted the hubby to help me cut some dead trees down and make my own live edge wood slabs but that didn't happen so I used the live edge slabs at HL. They are made of basswood and are a soft wood - probably not the best type of wood to make charcuterie boards. 
  • I used a stencil vinyl to make my design. I had some difficulty getting the stencil vinyl to stick to the wood to begin with. When I started laying a sheet of paper over the vinyl and rubbing the stencil down using a vinyl scraper tool, I had great contact.
  • Apply a very thin layer of the burn gel on the wood to get sharp edges on your design. I put a thicker layer on my first attempt and the gel soaked into the wood and I had blobby edges after I burned the gel. Luckily, all I had to do was sand the wood back down and was ready to start over. 
  • Keep your heat gun moving so that you don't scorch the area around the design and darken it. It takes a little while for the gel to heat up and begin to burn, so be patient. The longer you heat the gel, the darker it will get.
  • After burning and cooling the wood, I applied a food grade mineral oil all over the board to help seal the wood from food contaminants.
Charcuterie Board Designed & Made By Thistle Thicket Studio. www.thistlethicketstudio.com
I used a variety of sizes of boards. On two of them, I bought cabinet drawer handles and attached them to the ends of the board for handles. On the board I gifted, I glued wooden balls for feet to the bottom over the screw holes to hide the screws. I thought it really added some flair to the board. 

Charcuterie Board Designed & Made By Thistle Thicket Studio. www.thistlethicketstudio.com

Charcuterie Board Designed & Made By Thistle Thicket Studio. www.thistlethicketstudio.com
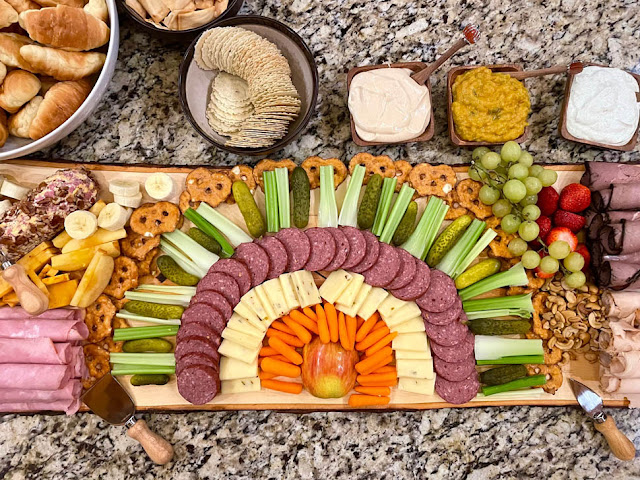
Here's a couple of photos of my Thanksgiving charcuterie boards. I finally gave up on making my turkey designed board because my grandsons were hungry and kept stealing food off my board faster than I could put them on, so my turkey needs some help! Lol! But the charcuterie was a big hit and a nice change from the heavy Thanksgiving lunch. 
 
Charcuterie Board Designed & Made By Thistle Thicket Studio. www.thistlethicketstudio.com
I hope I've shared enough info to answer any questions you may have. I watched several You Tube videos before I started, so you can check them out for additional information. 

Happy Crafting!

~Sharla


Friday, November 19, 2021

Happy Halloween Pillow

I didn't get this pillow completed in time for Halloween but I'm still super stoked about this finish! And Halloween will be here again before we know it!

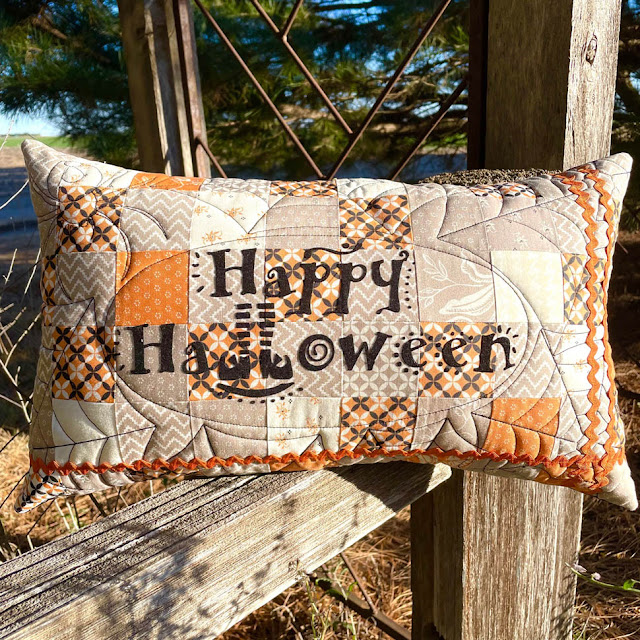
Happy Halloween Pillow Designed By Thistle Thicket Studio. www.thistlethicketstudio.com
I made this pillow from 2 1/2" strip scraps from my Pumpkin Squared quilt that I will be sharing in the near future. I cut the scraps into 2 1/2" squares and pieced them into a 10" x 20" rectangle. I then designed a Happy Halloween SVG for my Silhouette Cameo 4. Using flocked heat-transfer vinyl, I fused the design to the my pieced rectangle. I've never used flocked HTV before, but I absolutely love it in this application. 

I custom quilted my pillow top using a spider and cobwebs around the HTV. After quilting, I added some rick rack, which I love too. 

Happy Halloween Pillow Designed By Thistle Thicket Studio. www.thistlethicketstudio.com
For the back of the pillow, I used a decorative scalloped zipper for easy access for stuffing my pillow. I love, love, love this detail and will definitely be using more zippers in my pillow backs in the future.

Happy Halloween Pillow Designed By Thistle Thicket Studio. www.thistlethicketstudio.com
Soon I'll share the quilt that coordinates with this pillow and even share the pattern, so stay tuned!!

Happy Quilting

~Sharla

Leave A Comment


Saturday, October 23, 2021

A Memory Bunny

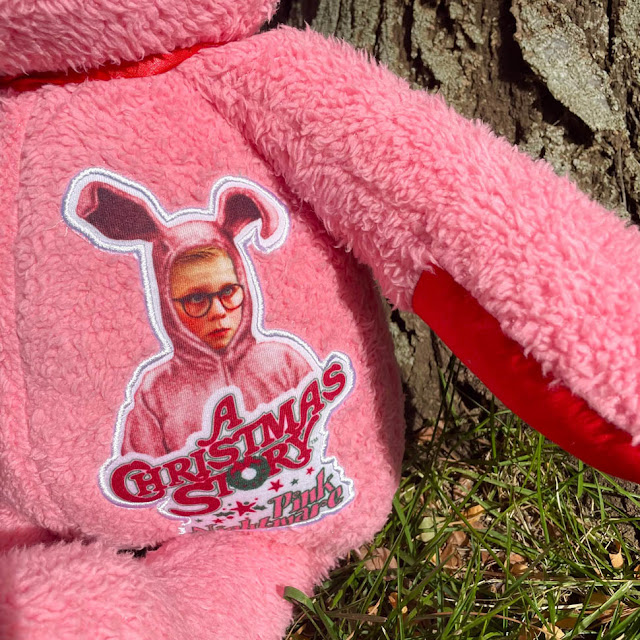
Doc Pepaw - The Memory Bunny by Thistle Thicket Studio. www.thistlethicketstudio.com
Today will be a sad day as my uncle's auction is today. My uncle passed away unexpectedly in late May. I told my cousin I would make a memory bear for her two-year-old son if she would send me some shirts. Rather that shirts, she sent me a pink bunny costume from the movie A Christmas Story that my uncle wore on holidays. So of course, the memory bear had to become a memory bunny!

Doc Pepaw - The Memory Bunny by Thistle Thicket Studio. www.thistlethicketstudio.com
I was a little leery of sewing with the material the bunny costume was made from, fuzzy and veerrrry stretchy in one direction. I decided to back the fabric with a fusible interfacing (Pellon SF 101 which is what I love to use for T-shirt quilts also), and set to work sewing. I used the Christmas Story logo on the chest of the bunny and used the existing ears. I found matching red cotton fabric for the paws and used heat transfer vinyl to add two names to the feet (my uncle was a veterinarian "Doc" and he was "Pepaw" to his grandson). 

Doc Pepaw - The Memory Bunny by Thistle Thicket Studio. www.thistlethicketstudio.com
I found a gift tag frame at Hobby Lobby and placed a photo of my uncle and his grandson in their bunny costumes and tied the frame tag around the neck of the bunny. I am so happy with how this memory bunny turned out!

By the time you read this post, I will have gifted the bunny to my cousin. I hope she will love the bunny and the memories it holds. 

XOXO

~Sharla

Leave A Comment


Monday, October 11, 2021

Latest MBS Book Available For Pre-Order


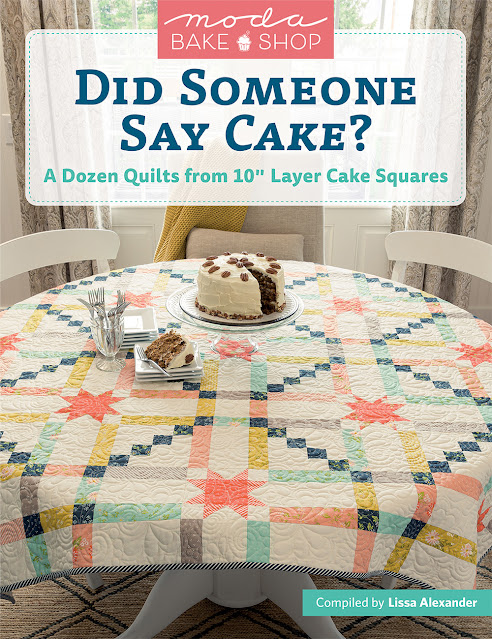
Did Someone Say Cake? Book Cover Featuring Thistle Thicket Studio Design. www.thistlethicketstudio.com
The latest Moda Bake Shop book called "Did Someone Say Cake?" is now available for pre-order from the publisher Martingale and on Amazon also! Yay!! Set to be released on February 1, this latest book is extra special to me because not only do I have a quilt pattern featured in the book, but my quilt is also featured on the cover! Someone pinch me, I must be dreaming!

I can't wait until I get to see it in person! February, hurry up and get here!

Until then, happy quilting!

~Sharla

Leave A Comment


Friday, September 17, 2021

Hello Sweet Cheeks!

Hello Sweet Cheeks Sign by Thistle Thicket Studio. www.thistlethicketstudio.com

Just popping on to share my latest crafting quicky. I made this bathroom sign today to hang in the downstairs bathroom that I am updating. So far I've chalk painted (gray) and waxed the vanity and hung a couple of floating shelves above the toilet. This sign will hang with the shelves. The new fixtures will be chrome, the walls a light gray, the vanity a darker gray. I'm currently waiting on the gray and white quartz countertop and then I am going to install white shiplap on the ceiling and on the wall above the vanity. To warm the space up, I am adding touches of stained wood and a few faux succulents. I forgot to take any before photos (and not sure I really want to share what it looked like before - 80s yuck!) but I'll be sure to share some after photos.

This sign is made from a live edge raw wood plaque that I picked up at Hobby Lobby. I taped off stripes to paint and stain. I then cut the lettering from vinyl using my Silhouette Cameo 4. It was easy peasy.

What quick craft project have you made lately?

Happy Crafting!

~Sharla


Wednesday, September 15, 2021

I'm A Cover Girl!

 Moda Bake Shop Book "Did Someone Say Cake" Cover Quilt by Thistle Thicket Studio. www.thistlethicketstudio.com
Say Whaaat??? Cake? As in 'this cover takes the cake'? Oh yes it does! I'm so incredibly excited to share that I have a quilt pattern featured in the next Moda Bake Shop book called "Did Someone Say Cake?". And that's not all! My quilt, "Dayna", made the cover of the book!!!

The book features 12 quilts made from layer cakes. My "Dayna" quilt uses a Happy Days layer cake by Sherri and Chelsi for Moda Fabrics, but you can use any layer cake of your choosing. You can still pick up a Happy Days layer cake from several Etsy shops, Amazon and the Fat Quarter Shop. (I'm not an affiliate of any of these, just helping out if you'd like to make a quilt like mine when the book comes out.)

The release date for "Moda Bake Shop: Did Someone Say Cake?" is February 2022. It will be available for pre-order at ShopMartingale, Amazon, and Barnes and Nobel in a few weeks. Of course, you can ask your local quilt shop to order the book from MartingaleWholesale also. 

Stay tuned for more details as February 2022 draws near!

Happy Quilting!

~Sharla

Leave A Comment


Monday, September 13, 2021

Welcoming Fall

Whoa!!! Where did summer go?! I have no idea but I know I am ready for fall! How about you?

I've really neglected my blog this summer and I promise to do better as my attention turns indoors. Hoping that means I'll be spending more time in my sanctuary - aka, my sewing room. When that happens, I hope to have more quilting and crafting inspiration to share here, but until then I'll share some of my summer in photos.....

Vintage Dresden Plate Quilt Project by Thistle Thicket Studio. www.thistlethicketstudio.com
Not much sewing has been happening for me this summer. In June, my mom and I enjoyed a two week, nine state excursion that included some quilt and antique shops. I found 13 vintage dresden blocks on deteriorated backgrounds that I am in the process of rescuing. Here's one block that I've machine appliqued to a new background.

Folded Star Mini Quilt by Thistle Thicket Studio. www.thistlethicketstudio.com
This folded star mini quilt is the only other sewing I have done this summer. I made the folded star top at our Dine 'n Dash quilters group a couple of weeks ago. It's really suppose to be a pot holder but I decided it was much to pretty to get dirty and hung it on my mini quilt wall instead.

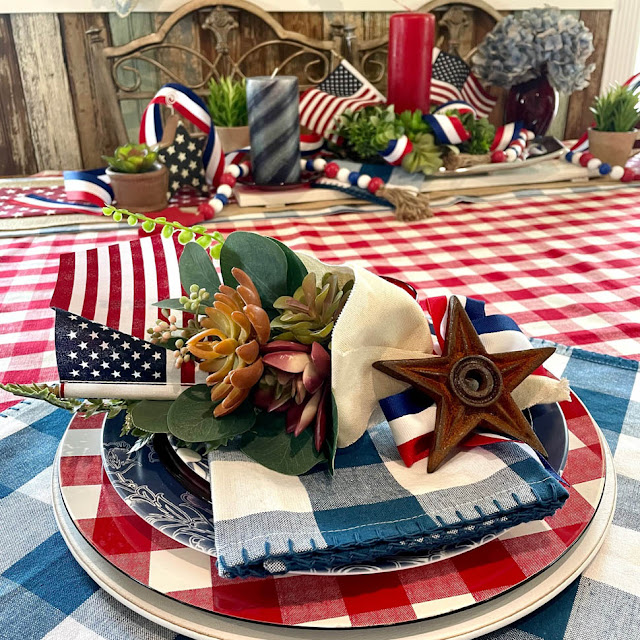
Patriotic Tablescape by Thistle Thicket Studio. www.thistlethicketstudio.com
When I get the itch for a quick creative project, I like to create festive tablescapes. This was my summer table view.

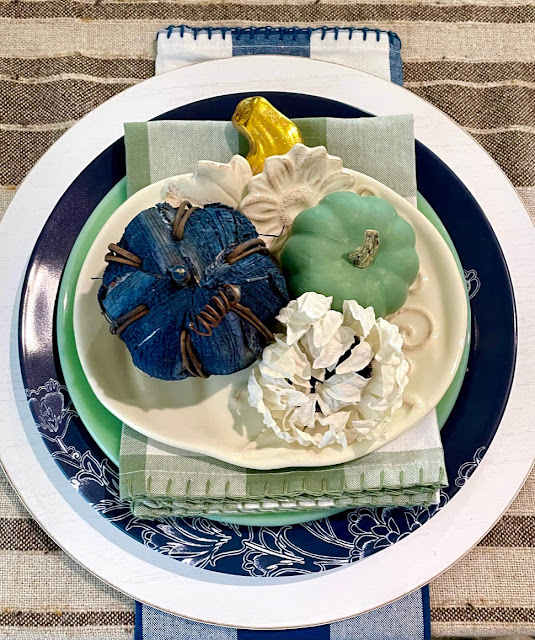
Fall Table Place Setting by Thistle Thicket Studio. www.thistlethicketstudio.com
This is my fall table setting. I am loving the unconventional blue and green colors.

Fall Tablescape by Thistle Thicket Studio. www.thistlethicketstudio.com
The little gold 'pumpkin' with the white 'stem' is made from a small jello mold and a drawer pull. Cute, easy and fun!

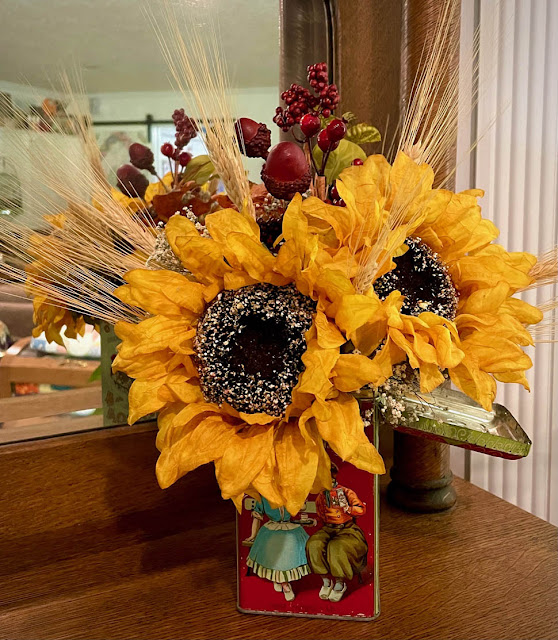
Droste Tin Sunflower Arrangement by Thistle Thicket Studio. www.thistlethicketstudio.com
Another quick creative project. My sister-in-law picked up this Droste Cocoa tin at an auction and gifted to me (my maiden name is Droste) and I decided to make a fall arrangement in it.

Hello Screen Door Greeting by Thistle Thicket Studio. www.thistlethicketstudio.com
And one more quick craft project. Yesterday I added this vinyl 'hello' to my back screen door. Since everyone uses our back door as the main entrance, I thought a little greeting would be fun. I wonder if the FedEx driver noticed it today?

Homegrown and Canned Produce by Thistle Thicket Studio. www.thistlethicketstudio.com
Much of my summer seemed to be spent in the yard watering plants and picking produce. This is the first time in more than 30 years I decided to do some canning. I canned a batch of corn and cherry tomato salsa and pickled banana peppers.


Peach jelly by Thistle Thicket Studio. www.thistlethicketstudio.com
I also made peach jelly from a box of Colorado peaches. I also froze some for peach cobbler.

Corn-on-the-cob ready for the freezer by Thistle Thicket Studio. www.thistlethicketstudio.com
Thanks to a neighboring farmer, I also froze about 6 dozen ears of sweet corn.

Chalk Painted Cabinet Doors by Thistle Thicket Studio. www.thistlethicketstudio.com
I decided last month to tackle our spare bathroom and remodel it. I painted the standard honey oak 90s cabinets with a gray chalk paint and then waxed them. I'm now awaiting a new quartz countertop and sink before installing painted shiplap on the vanity wall and ceiling. 

Celebrating 60 Years! www.thistlethicketstudio.com
And this happened at the end of August - I turned 60! Had a great time in Kansas City with my mom, kids and hubby celebrating. Although you can't see much of it, I designed this "Cheers to 60 Years" SVG to put on a shirt.

Hope y'all had a great summer too! I look forward to keeping in better touch with everyone for some quilting and crafting fun this fall and winter!

Happy Quilting!
~Sharla


Friday, June 18, 2021

One Secret Sewing Project Revealed

Well Hello! I'm back after an unexpected hiatus that included a couple of weeks camping in Texas, taking care of my mom after a fall and surgery, three secret sewing projects, a 40-60-80 girls' birthday trip, and a family wedding. Whew! Where did the time go? I'm glad to be back to share one of those secret sewing projects that has been gifted so now I can share!

Stash Buster Quilt Made By Thistle Thicket Studio. www.thistlethicketstudio.com

Last year, our quilt guild chose to participate in Border Creek Station's 2020 Stash Buster Challenge. I decided to pull all of my pastel floral prints from my stash to use in this challenge and as I was doing so, the boho shabby chic feel of the fabrics made me think of my niece who loves pastel pink. So I decided to make the quilt for my niece's wedding gift.

Stash Buster Quilt Made By Thistle Thicket Studio. www.thistlethicketstudio.com

Making the blocks took much longer than I anticipated. I worked on them off and on last year, then worked on them during my mom's 80th birthday sewing weekend and during the three weeks I stayed with her after her fall and surgery. 

Stash Buster Quilt Made By Thistle Thicket Studio. www.thistlethicketstudio.com

When I had 200 blocks made, I decided to start laying it out to figure out the layout. I originally had planned to randomly place the colors in a double diamond pattern, but you couldn't see the design because of the random color placement. So I decided to start grouping the darker colors together thinking it would help to have a focal point and soon the final layout emerged. Of course, I didn't have enough dark blocks for the big X border in the design so I ended up having to make an additional 32 blocks. I added a border around the outside so the quilt measured 90" x 90".

Stash Buster Quilt Made By Thistle Thicket Studio. www.thistlethicketstudio.com

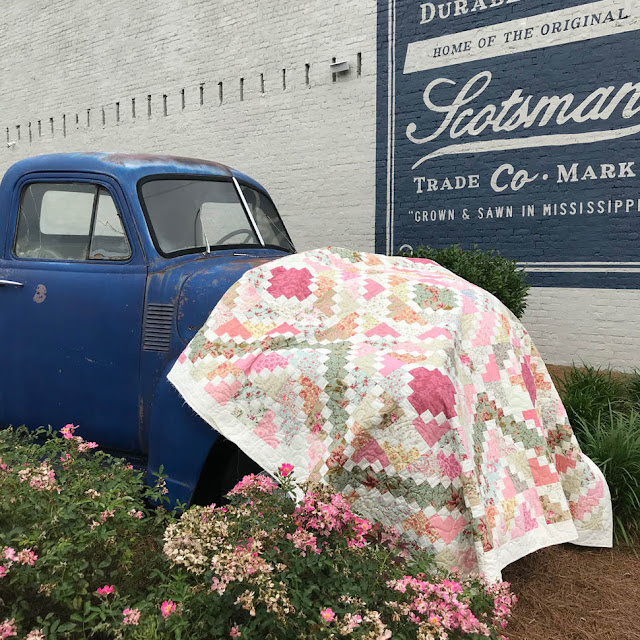
As per my usual M.O., I was still hand sewing the binding on when mom and I left for our 40-60-80 girls' birthday trip on June 1, so at night in the hotel room, I would sew. Our birthday trip consisted of driving to Nashville (and lucky us, Hancock's of Paducah was right on the way!) where my daughter met us for a long weekend celebration. If you haven't figured it out yet, my mom turned 80 this year in January, I turn 60 in August and my daughter turns 40 in October - so of course we had to celebrate the occasion! After our weekend in Nashville, mom and I spent the next week traveling to Texas for my niece's wedding. One of our stops on our way was to visit Laurel, Mississippi, home to Ben and Erin Napier of HGTV's 'Home Town' fame. When I saw this blue truck beside Erin's store, I had to get a few photos of the quilt! If you look close, you can see that I still have part of the binding yet to sew down.

Stash Buster Quilt Made By Thistle Thicket Studio. www.thistlethicketstudio.com

We were lucky to be able to squeeze in time before the wedding to give our gifts to the bride and groom and get to watch them open them up. I hope they love the quilt as much as I do and hope they enjoy it for many years to come.

~Happy Quilting

Sharla

Leave A Comment


Wednesday, March 3, 2021

Miscellany

Just popping in to update on things in the Thistle Thicket Studio lately. It's been hard to find the my mojo but I have been working on my Moda Block Heads 3 quilt. I finally finished all of the 56 MBH3 blocks and made an additional 8 blocks from MBH2. All 6". What was I thinking!!! I swore after making the Farmer's Wife quilt that I would never make 6" blocks again. But don't they look so cute all laid out on my 'design floor'?

Moda Block Heads 3 Blocks by Thistle Thicket Studio. www.thistlethicketstudio.com
I'm working on the setting blocks for this quilt now. I'm going to use Lella Boutique's Mama's Linoleum setting so I have 120 6" setting blocks to make now. Ugh, more 6" blocks! Luckily these go together fairly quickly. Not sure I will get this finished before the end of the first quarter of the 2021 Finish-A-Long or not as I'm hoping to sneak away and spoil the grandkids later this month.

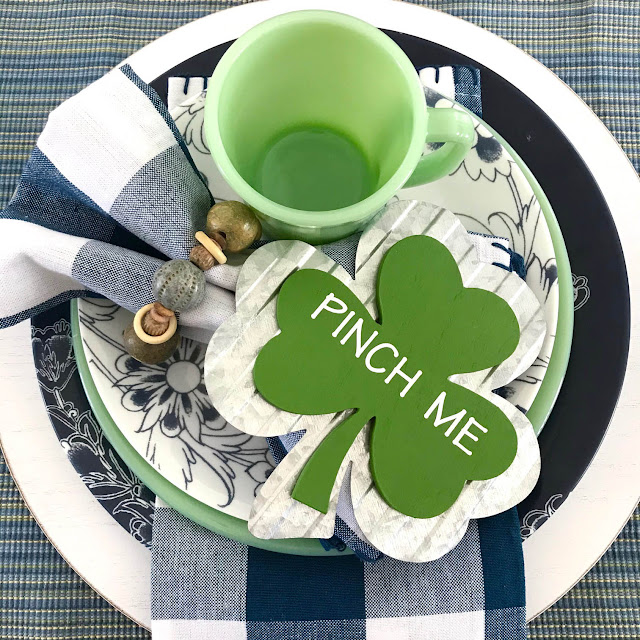
St. Patty's Day Table Scape by Thistle Thicket Studio. www.thistlethicketstudio.com
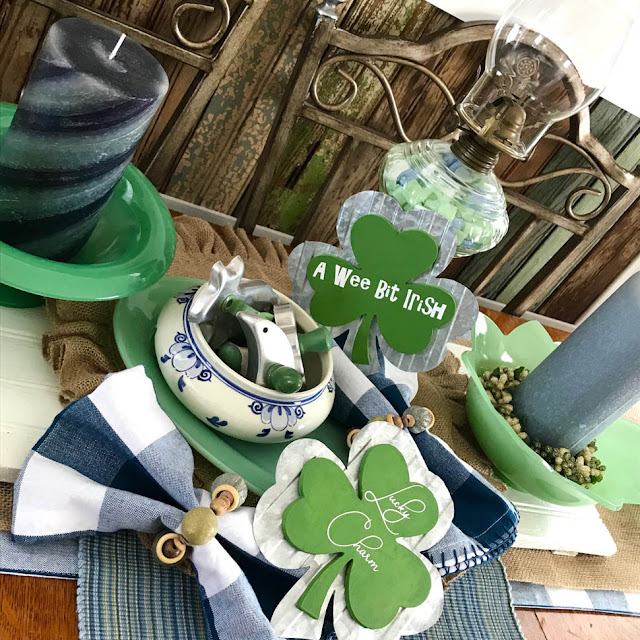
I updated my dining room table with lucky clovers for St. Patrick's Day. I had purchased wooden and tin hearts from Hobby Lobby and added cute candy heart sayings cut on my Silhouette Cameo 4 for Valentine's Day (see post here), so I was excited to find similar clovers so I had to get them for my table. I repainted the wooden part with a lighter green (which still ended up not being as light as I wanted) and then added the sayings in white vinyl. 

St. Patty's Day Table Scape by Thistle Thicket Studio. www.thistlethicketstudio.com
I'm really loving my blue and white themed table but thinking I'll get out my Pfaltzgraff Pistoulet dinnerware to do a spring table scape after St. Pat's Day is over. Can't wait to start playing.

Vintage Tea Cup on Thistle Thicket Studio. www.thistlethicketstudio.com
This whole pandemic thing has really got me itching to go antiquing. I haven't gotten to do it much (or any in person anyway) this last year. So it was fun yesterday when I had to go to a neighboring town for a farm errand and made a quick stop at a thrift shop. I picked up this cute tea cup and saucer to add to my collection. 

Vintage Santa Pitcher on Thistle Thicket Studio. www.thistlethicketstudio.com
I have done a little 'antiquing' on Instagram this past year. I have only purchased from one person but she makes it soo easy - too easy because it makes me want to buy all the things! Last week my latest acquisition arrived and he's so stinkin' cute. I collect Santa mugs but have never seen a Santa pitcher until my aunt and I were texting and she showed me hers. Then a couple of weeks ago, my one and only fav IG seller posted a photo of her booth at an antique mall and low and behold, there was a Santa pitcher sitting front and center. I responded that I was interested in it and it was soon on its way to me. Like I said, she makes it way too easy!

So what have you been up to lately? I'd love to hear what you're working on! 

Happy Sewing/Crafting/Antiquing!

~Sharla

Leave A Comment


Sunday, February 7, 2021

Exploding Valentine Boxes

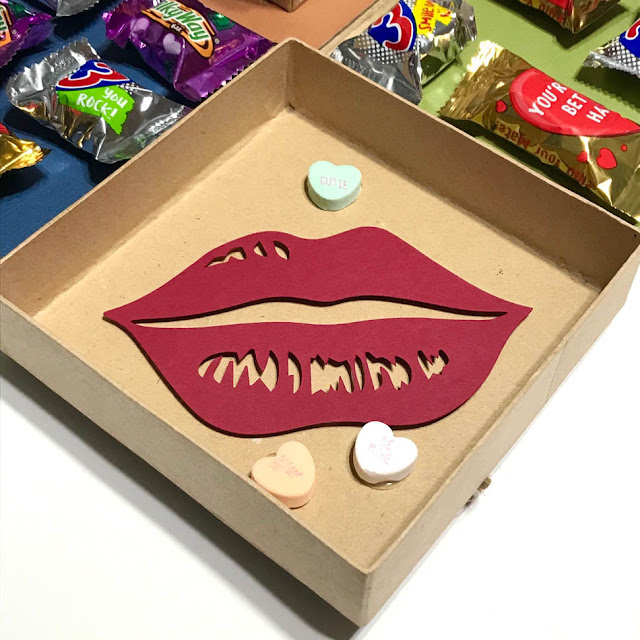
Exploding Valentine Boxes by Thistle Thicket Studio. www.thistlethicketstudio.com

With Valentine's Day just around the corner, I spent the last couple of days making Valentines for my grandsons. Not just any ol' valentine will do for my grands so I thought I'd try my hand at making exploding Valentine boxes. 

Exploding Valentine Boxes by Thistle Thicket Studio. www.thistlethicketstudio.com
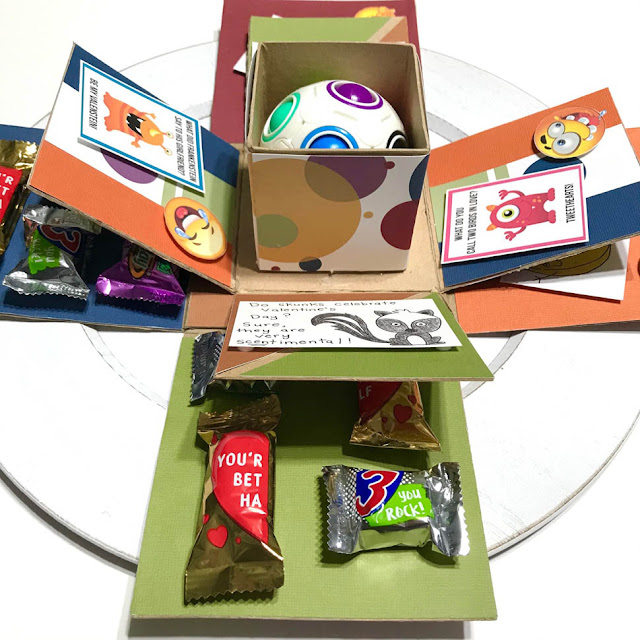
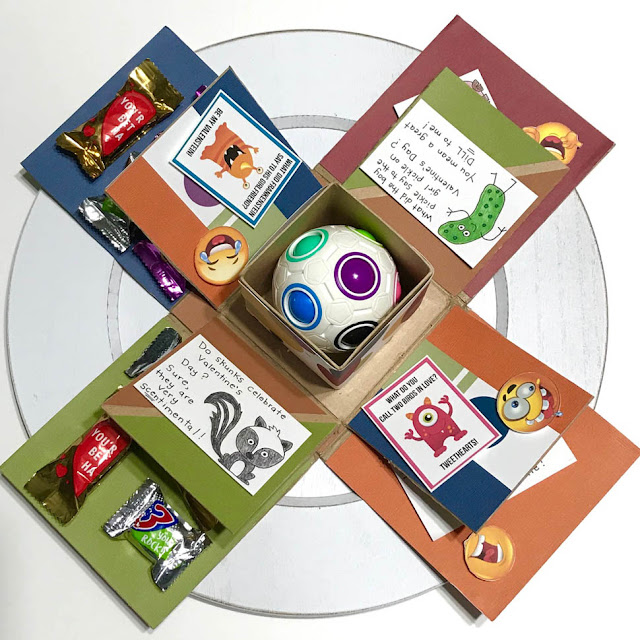
No they don't really explode, rather when the lid is removed the sides of the boxes fall out to reveal another box inside. Removing the next box lid will result in the same 'explosion' revealing yet another box. The third box in my exploding boxes do not 'explode' but rather holds a little gift.

Exploding Valentine Boxes by Thistle Thicket Studio. www.thistlethicketstudio.com
To make an exploding box, you need a set of boxes that graduate in size and will fit inside each other. I found my set of boxes at Hobby Lobby. Next, you cut the sides of the boxes apart at the corners so that the entire box lays flat. I cut the two largest boxes leaving the smallest one in tact.

Exploding Valentine Boxes by Thistle Thicket Studio. www.thistlethicketstudio.com
Next, decorate the outside and inside of each panel of the box. I used scrapbook paper, some printed valentine jokes and emoji laughing faces, candy, and hearts cut on my Silhouette Cameo 4. I used stick glue, hot glue and adhesive foam dots to attach the different items to the boxes.

Exploding Valentine Boxes by Thistle Thicket Studio. www.thistlethicketstudio.com
Place your gift in the smallest box and place the lid on top. The smallest box is then hot glued to the inside center of the medium size box. Holding the sides of the medium box up, place the lid on top and then the medium size box is glued to the inside center of the largest box. Lastly, hold the sides of the largest box together and place the lid on top. 

Exploding Valentine Boxes by Thistle Thicket Studio. www.thistlethicketstudio.com
TA DA! Your exploding box is ready to gift. You can make exploding boxes for any occasion and in any size. Wouldn't it be a fun way to wrap presents at Christmas?!

Exploding Valentine Boxes by Thistle Thicket Studio. www.thistlethicketstudio.com
I found several ideas for these decorative boxes on Pinterest, just search for exploding boxes. You can get really creative if you have the time. Mine are pretty simply decorated but it still took me two whole afternoons to make them.

Exploding Valentine Boxes by Thistle Thicket Studio. www.thistlethicketstudio.com
Can't wait to see the creative exploding boxes ya'll make. Tag me on Instagram if you make one!

Happy Crafting!

~Sharla

Leave A Comment