Friday, December 11, 2020

A Pincushion Exchange

Last night our quilt guild celebrated the holidays with their annual Christmas carry-in meal and gift exchange, all socially distanced. Members were encouraged to gift a handmade pincushion and had three months to craft their gift.

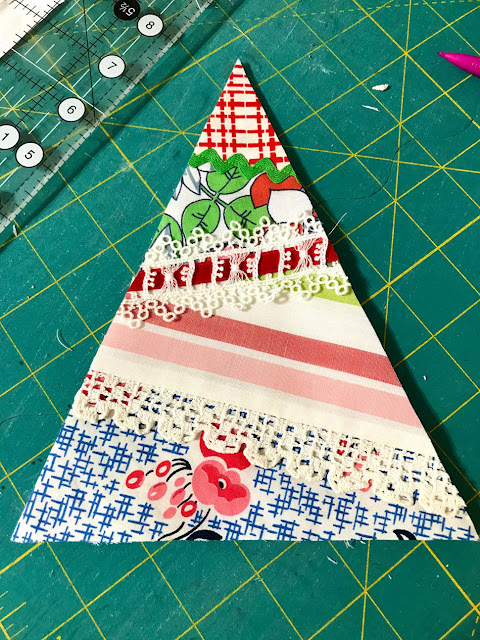
Christmas Tree Pincushion Made From Vintage Fabrics By Thistle Thicket Studio. www.thistlethicketstudio.com

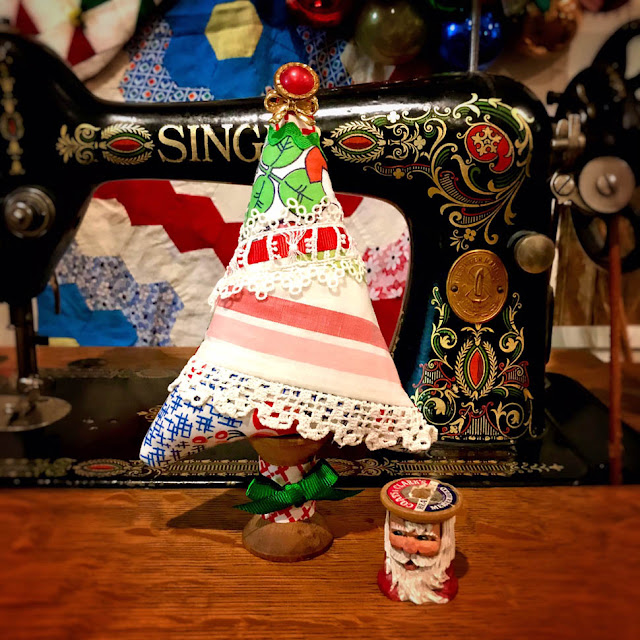
I decided I wanted to make a pincushion from some of my vintage fabric stash and finally landed upon the idea of a Christmas tree pincushion. I chose some 30's fabric scraps that had either red or green in them. I used a muslin foundation topped with a piece of fusible batting. I then did a stitch and flip method of foundation piecing the scraps, adding some vintage lace and rick rack for finishing details.

Christmas Tree Pincushion Made From Vintage Fabrics By Thistle Thicket Studio. www.thistlethicketstudio.com

Once pieced and the front and back tree shapes sewn together, the triangle shape was filled with crushed walnut shells. After sewing the bottom closed, I hot glued a vintage wooden thread spool to the bottom for the tree trunk base. A vintage button and metal bow topped the tree. I was happy with how my pincushion turned out, so much so that I almost hated to gift it!

Vintage Cat Planter Pincushion on Thistle Thicket Studio. www.thistlethicketstudio.com

To exchange our pincushions, we played Quilt Bingo. As someone got a 'bingo', they selected a wrapped package holding a pincushion. We played one looong game of bingo until everyone had a bingo and picked a gift. Since I was calling numbers, I took the last remaining package which happened to be from my mom. My mom made a pincushion from a vintage ceramic cat planter. Isn't it cute!! And extra special since she made it.

Are you making any special gifts for Christmas using vintage fabric or items? I would love to hear about your vintage creations!

Happy Sewing!

~Sharla

Leave A Comment


Monday, December 7, 2020

A New Hobby

Our family celebrated both Christmas and Thanksgiving over the week of Thanksgiving. That means my Christmas tree looks pretty lonely with no Christmas presents under it this year. But it also means I get to play with my Christmas presents earlier this year! My kids gifted me a Silhouette Cameo 4 and I thought I'd share my first project!

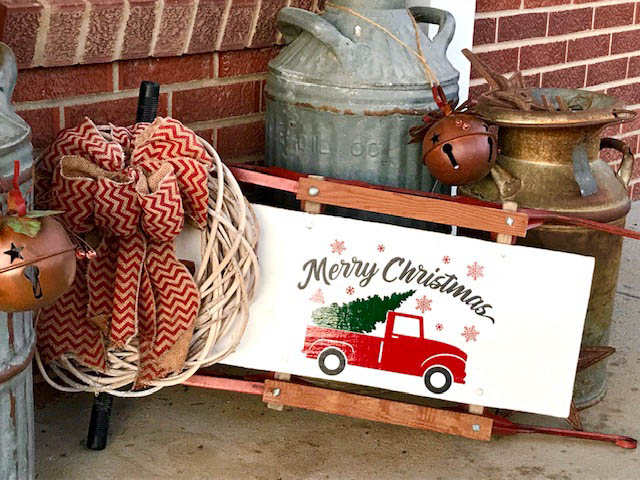
Vintage Sled with Vinyl Decal by Thistle Thicket Studio. www.thistlethicketstudio.com
I'm not sure I need another hobby, but I can see this will get addictive! I have a lot to learn with it but I was pleased with my first project. This is an old sled that my mom gave me and it had plywood where I imagine it once had a nicer board with a painted logo or design. I decided to dress up the plain plywood by painting it white then applied a vinyl decal that I cut on the Silhouette of a red truck carrying a tree with a Merry Christmas greeting. The weeding was a little tedious on those snowflakes and I learned my eyesight isn't what it used to be (truthfully, I really already knew that). The sled now is part of my patio decor and greets visitors to our home.

What holiday craft projects are you working on this month? I'll share another project I made this week after it is gifted. I'd love for you to share your projects with me!

Happy Crafting!

~Sharla


Leave A Comment


Sunday, November 1, 2020

Jello Mold Pumpkins

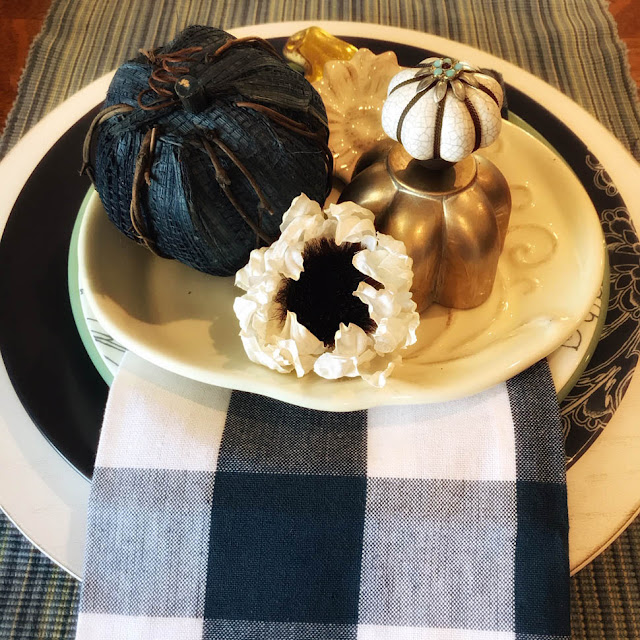
Jello Mold Pumpkins by Thistle Thicket Studio. www.thistlethicketstudio.com
What??? OMG, I knew I hadn't posted in awhile, but a whole month?! You know there's some serious stuff happening in my sewing studio when I haven't posted for a month. Unfortunately, I've been doing some secret sewing and designing and can't share any of it right know. So I decided to pop in and share a little crafty project I made this morning, these vintage Jello Mold Pumpkins! They took no time at all - especially since I sent the hubby out to the workshop to drill the holes for me!

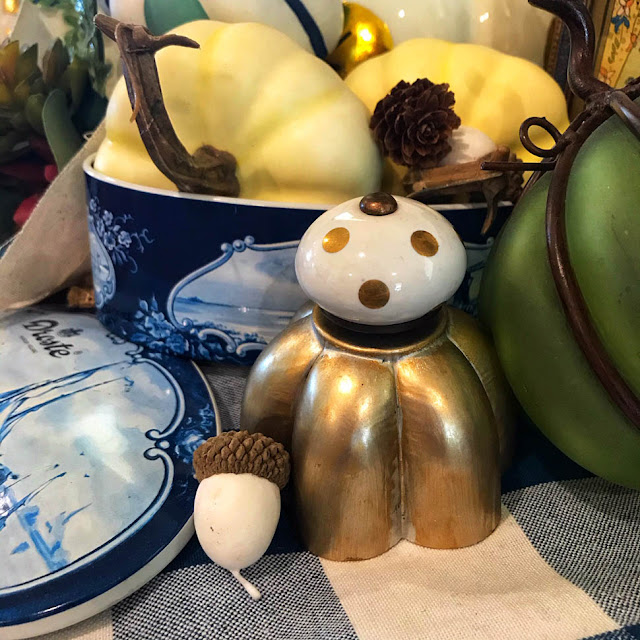
Jello Mold Pumpkins by Thistle Thicket Studio. www.thistlethicketstudio.com
I rubbed a little gold metallic wax finish on the outside of the molds to give it a little hint of gold. Then drilled a hole in the center of the bottom and attached a drawer pull through the hole. Easy peasy! I picked up the drawer pulls at Hobby Lobby and chose ones that were white ceramic and had some gold accents so they coordinated with my other fall pumpkins and decor. Oh by the way, I am loving my navy, jadeite green and white fall table decor this year!

Jello Mold Pumpkins by Thistle Thicket Studio. www.thistlethicketstudio.com
Actually, I still need to add some curly wire around the base of the knob for tendrils but I was so excited to share. I'll try to remember to share another photo after I get some wire and finish them properly.

Jello Mold Pumpkins by Thistle Thicket Studio. www.thistlethicketstudio.com
I think these are so cute! I have more jello molds and am thinking of ideas to make some Christmas crafts. Got ideas? Please share 'em!

Happy Crafting!

Sharla

Leave A Comment


Friday, October 2, 2020

A Lightbulb Moment Stockings

It's Friday again and I'm back to share the final "A Lightbulb Moment" bonus project with ya'll today. No Christmas would be complete without stockings hung by the fire! So here are two versions of my "A Lightbulb Moment" Stockings using the leftover scraps from making the large lightbulb blocks in my other projects.

A Lightbulb Moment Stockings Designed By Thistle Thicket Studio. www.thistlethicketstudio.com

The instructions are for a solid body stocking cut from fabric but I couldn't resist not using up all the triangles left over from making the lightbulb blocks. I just can't throw those pieces away unless they are really teeny tiny. Anyone else save all those leftovers?

A Lightbulb Moment Stockings Designed By Thistle Thicket Studio. www.thistlethicketstudio.com

This stocking used the oblong triangles cut from the sides of the lightbulb. I used my BlocLoc half-rectangle triangle ruler set to square the rectangles after sewing the triangles together. 

A Lightbulb Moment Stockings Designed By Thistle Thicket Studio. www.thistlethicketstudio.com

This stocking used the triangles from the upper corners of the lightbulb. They made half square triangles and I squared them up with my BlocLoc half square triangle ruler. I just love my BlocLoc rulers!

A Lightbulb Moment Stockings Designed By Thistle Thicket Studio. www.thistlethicketstudio.com

I just sewed the squares and rectangles into a pieced section that measured 11.5" x 19", fused the fleece batting to the back side, layered it with a piece of plain fabric for my stocking body back (right sides together), then cut out the stocking.

Click Here To Download "A Lightbulb Moment" 

Stocking Pattern

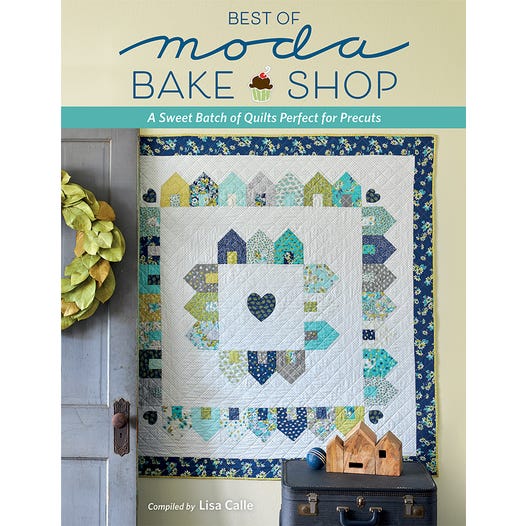
Best of Moda Bake Shop Book Featuring A Lightbulb Moment Quilt By Thistle Thicket Studio. www.thistlethicketstudio.com

The lightbulb blocks in the cuff of the stocking are reduced to 25% the size of the original block. You'll need the "Best of Moda Bake Shop" book for instructions on how to make the block and then the download pattern gives you the formula for figuring the sizes of each piece of the block to reduce the size.

A Lightbulb Moment Stockings Designed By Thistle Thicket Studio. www.thistlethicketstudio.com

I've shared a total of 10 bonus patterns over the last couple of months. You can click here to see links to all of the patterns.

A Lightbulb Moment Pillows Designed By Thistle Thicket Studio. www.thistlethicketstudio.com

I've really enjoyed sharing all of these patterns and hope ya'll have enjoyed them too. I've been making plans on how I'm decorating for the holidays this year to incorporate all of these lightbulb projects. Yesterday I found jumbo lightbulb lawn stakes that light up and I'm going to use them as lights on my Christmas tree this year. I'm also drooling over Fiestaware's lightbulb dishes. I may have to splurge and buy me some of the lightbulb-shaped plates. Dang, why does Fiestaware have to be so pricey?

A Lightbulb Moment Quilt Designed By Thistle Thicket Studio & Featured In The Book "Best of Moda Bake Shop". www.thistlethicketstudio.com

Tomorrow I'm presenting a trunk show with all of my "A Lightbulb Moment" projects. Can't wait, should be fun!

Happy Quilting!

~Sharla

Leave A Comment


Friday, September 25, 2020

A Lightbulb Moment Placemat

Howdy! I'm back to share another "A Lightbulb Moment" project with ya'll today. You can't celebrate the holidays without a decked out table and you can't have a decked out table without placemats! So, to go with the table runner that I shared a while back (can you believe almost 2 months ago?!), here is the "A Lightbulb Moment Placemat"....

A Lightbulb Moment Placemats Designed By Thistle Thicket Studio. www.thistlethicketstudio.com
I think these placemats are so fun and feature a pocket for silverware and a napkin. I decided to mix up the colors of my lightbulbs and binding on each placemat to make them more festive.

Click Here To Download The "A Lightbulb Moment Placemat" Pattern


A Lightbulb Moment Placemats Designed By Thistle Thicket Studio. www.thistlethicketstudio.com
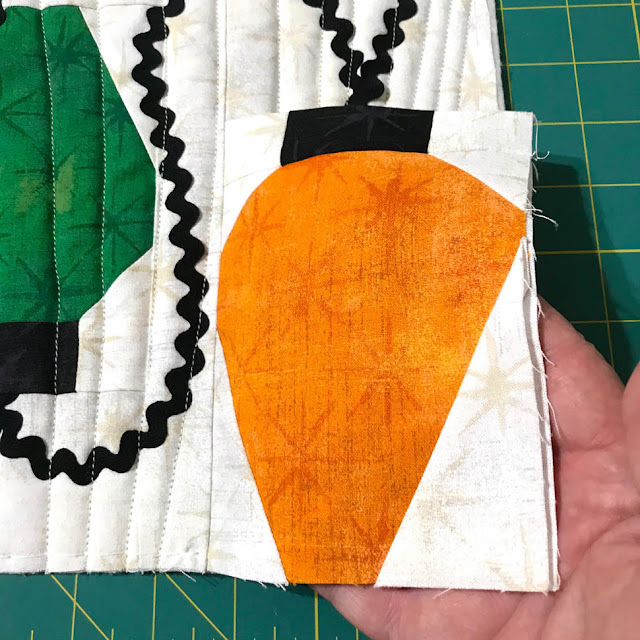
Here is a photo of the pocket portion of the placemat. You can see how the left side of the pocket is sewn in the seam. To quilt it, I mounted the placemat sideways on my quilting machine then chose a linear pattern that quilted from left to right. I quilted one side of the placemat up to the pocket, then flipped the pocket and quilted the other side.

A Lightbulb Moment Placemats Designed By Thistle Thicket Studio. www.thistlethicketstudio.com
Here you can see underneath the pocket and how I just folded the rick rack over to change directions just below the top edge of the pocket.

Best of Moda Bake Shop Book Featuring A Lightbulb Moment Quilt Designed By Thistle Thicket Studio. www.thistlethicketstudio.com
To make these placemats, you'll need the book "Best of Moda Bake Shop" which has the directions on how to make the lightbulb block and then the placemat pattern (link above) for directions on how to assemble the placemat. The "Best of Moda Bake Shop" book is available on Amazon or at your local quilt shop.

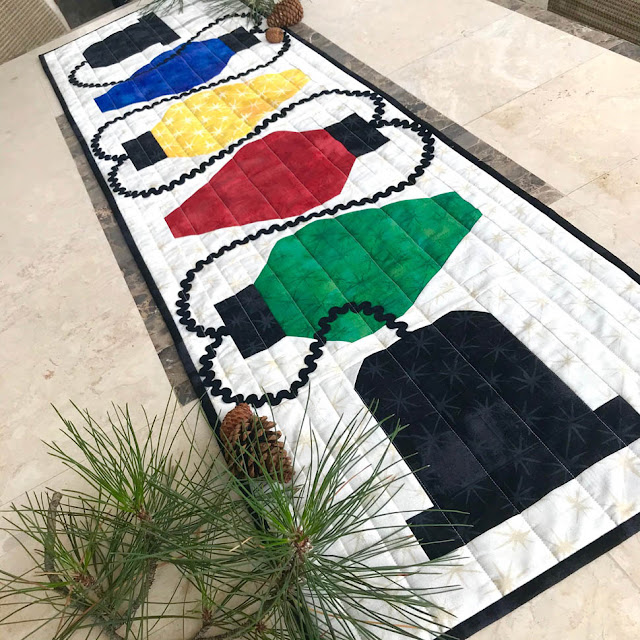
A Lightbulb Moment Table Runner Designed By Thistle Thicket Studio. www.thistlethicketstudio.com
And here's the table runner that coordinates with the placemats. You can find that pattern here. To see the whole line of bonus "A Lightbulb Moment" patterns, click here.

A Lightbulb Moment Placemats Designed By Thistle Thicket Studio. www.thistlethicketstudio.com
I hope you enjoy this bonus pattern to my "A Lightbulb Moment" quilt. If you make it, please be sure to share a photo with me by tagging me on social media!

Happy Quilting!

~Sharla


Wednesday, September 16, 2020

A Lightbulb Moment Advent Calendar Bunting

Oh My Goodness!!! Where has the past three weeks gone?! I meant to get another "A Lightbulb Moment" pattern posted long before now but didn't have the time to finish writing the pattern. Better late than never, right? I shared photos of this advent calendar bunting a few weeks ago on IG but now I'm sharing them here along with the free pattern. YAY!!!

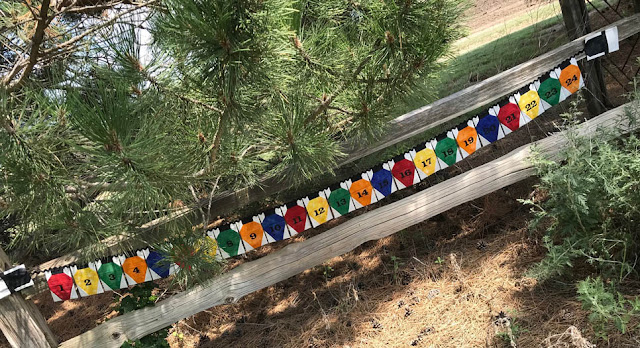
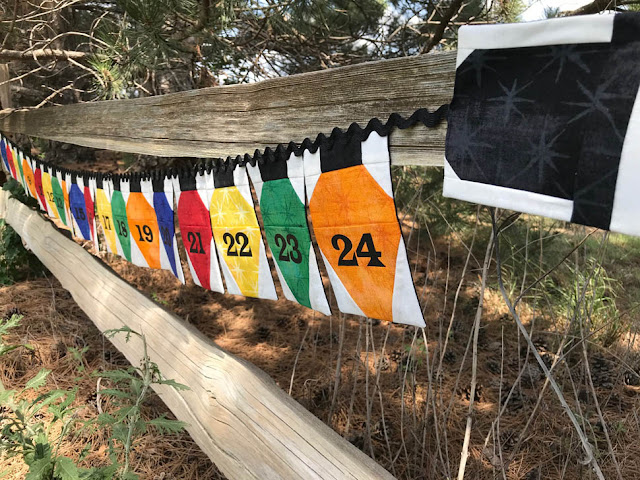
"A Lightbulb Moment" Advent Calendar Bunting by Thistle Thicket Studio. www.thistlethicketstudio.com

This advent calendar was so fun to make and I can't wait until the holidays so I can hang it and fill each pocket with little surprises for my grandsons. Since they won't be here until a day or two before Christmas, we may have to count down the whole month on Christmas Eve Day, but it will be fun nonetheless.

"A Lightbulb Moment" Advent Calendar Bunting by Thistle Thicket Studio. www.thistlethicketstudio.com

This bunting is looong at 112". I have a long shelf I plan to hang it from. It could also be draped down a staircase rail. But if you don't have a long place to hang it, you could make them into shorter lengths and hang them in a Christmas tree shape on a wall (if you make 25 lightbulb blocks and skip the socket blocks, you can group them in sets of 1, 3, 5, 7, 9).

"A Lightbulb Moment" Advent Calendar Bunting by Thistle Thicket Studio. www.thistlethicketstudio.com

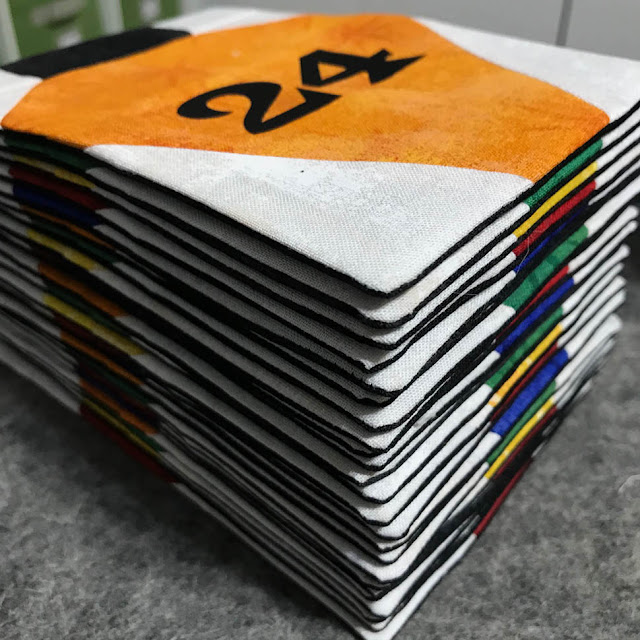
I couldn't resist taking a photo of all the mini quilts stacked up before I sewed them together with the rick rack. 

Click Here To Download The PDF Of

A Lightbulb Moment Advent Calendar Bunting Pattern

"A Lightbulb Moment" Advent Calendar Bunting by Thistle Thicket Studio. www.thistlethicketstudio.com

Using fusible batting gives the blocks enough shape that no quilting is necessary. And sewing and turning them instead of using binding makes them quick and easy to make. 

Best of Moda Bake Shop Book Featuring "A Lightbulb Moment" Quilt by Thistle Thicket Studio. www.thistlethicketstudio.com

This pattern shows you how to assemble the lightbulb and plug in blocks into the advent calendar bunting. You'll need the "Best of Moda Bake Shop" book for the instructions on how to make the blocks themselves. The book is available on Amazon or at most local quilt shops.

"A Lightbulb Moment" Advent Calendar Bunting by Thistle Thicket Studio. www.thistlethicketstudio.com

I hope you enjoy this project and share your photos with me if you make an advent calendar bunting of your own.

Happy Quilting!

~Sharla

Leave A Comment


Friday, August 28, 2020

Best Of Moda Bake Shop Pillow Parade

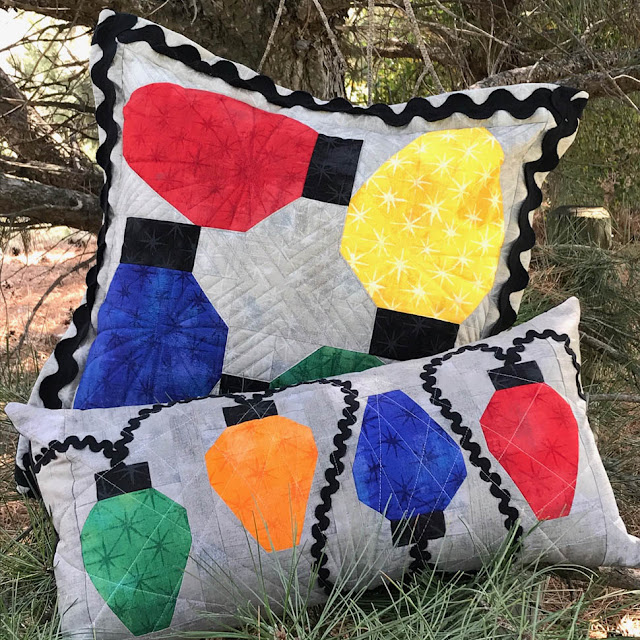
Yay! Yesterday was my birthday and today is my turn on the Best of Moda Bake Shop Pillow Parade so let's celebrate with not one, but TWO, free pillow patterns featuring my lightbulb block from the quilt "A Lightbulb Moment"!!!

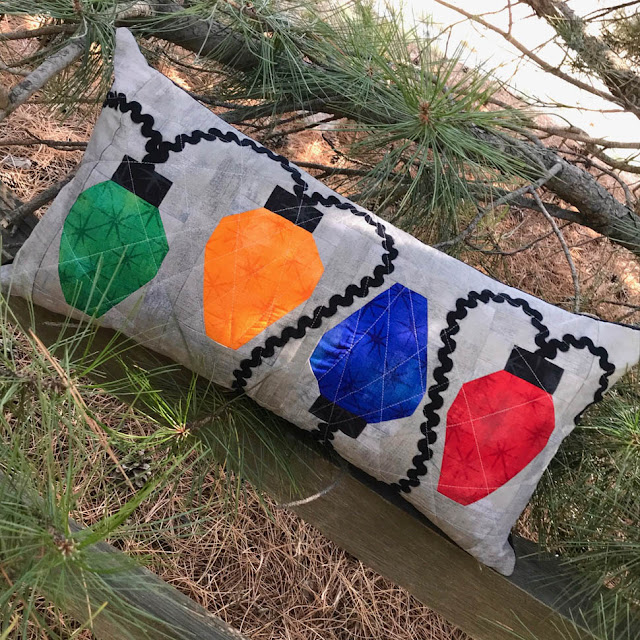
A Lightbulb Moment Pillows Designed By Thistle Thicket Studio. www.thistlethicketstudio.com

The two pillows would look so cute on a sofa during the holidays and, of course, will coordinate with the "A Lightbulb Moment" quilt featured in the Best of Moda Bake Shop book. You'll need the book for the directions on how to make the lightbulb block which is available on Amazon or at your local quilt shop now. Then download the pillow patterns below for directions on how to make the pillows.

A Lightbulb Moment Pillows Designed By Thistle Thicket Studio. www.thistlethicketstudio.com

Click Here For "A Lightbulb Moment" Square Pillow Pattern

A Lightbulb Moment Pillows Designed By Thistle Thicket Studio. www.thistlethicketstudio.com

Click Here For "A Lightbulb Moment" Oblong Pillow Pattern

A Lightbulb Moment Table Runner Designed By Thistle Thicket Studio. www.thistlethicketstudio.com

I have created an entire line of accessories using my lightbulb block pattern, from a table runner to a tree skirt to an advent calendar and more. I've shared a few already and more are to come in the next few weeks. You can access and download each of the patters by clicking on the "A Lightbulb Moment Bonus Projects" header at the top of my home page or by clicking HERE.

A Lightbulb Moment Tree Skirt Designed By Thistle Thicket Studio. www.thistlethicketstudio.com

I hope you enjoy these "A Lightbulb Moment" patterns as much as I have designing them! To celebrate my turn on the MBS Pillow Parade, I'm hosting a giveaway for a copy of the Best of Moda Bake Shop book on Instagam, so stop by there to enter!

Best of Moda Bake Shop Book Featuring "A Lightbulb Moment" Quilt By Thistle Thicket Studio. www.thistlethicketstudio.com


Happy Quilting!

~Sharla

Leave A Comment


Tuesday, August 25, 2020

A Sliding Screen Door For My Sewing Studio

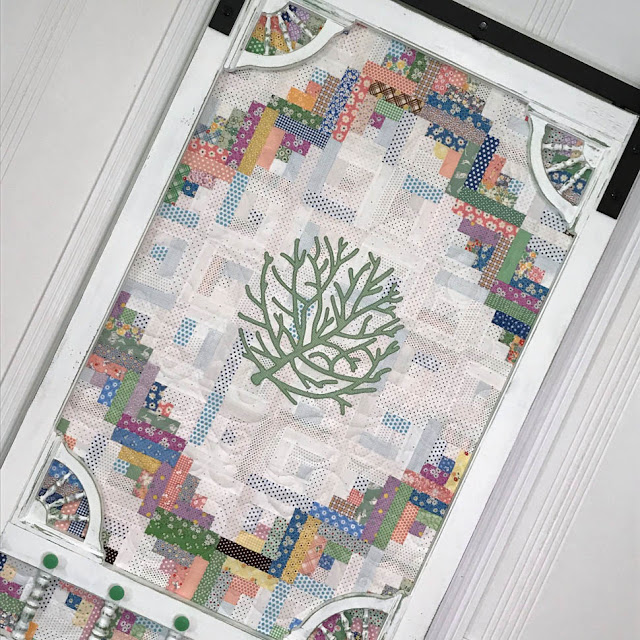
Sliding Quilted Screen Door by Thistle Thicket Studio. www.thistlethicketstudio.com

Finally! I've had this project in my head for a couple of years and I finally can check it off my to-do list! I love the whole farmhouse sliding barn door look and wanted a similar door for the entrance into my studio (aka sewing room). I originally wanted a vintage screen door with chippy green paint but I couldn't find a door that I liked in a reasonable price range. So I eventually settled for a new screen door. And now that the project is finished, I'm glad that I did!

Sliding Quilted Screen Door by Thistle Thicket Studio. www.thistlethicketstudio.com

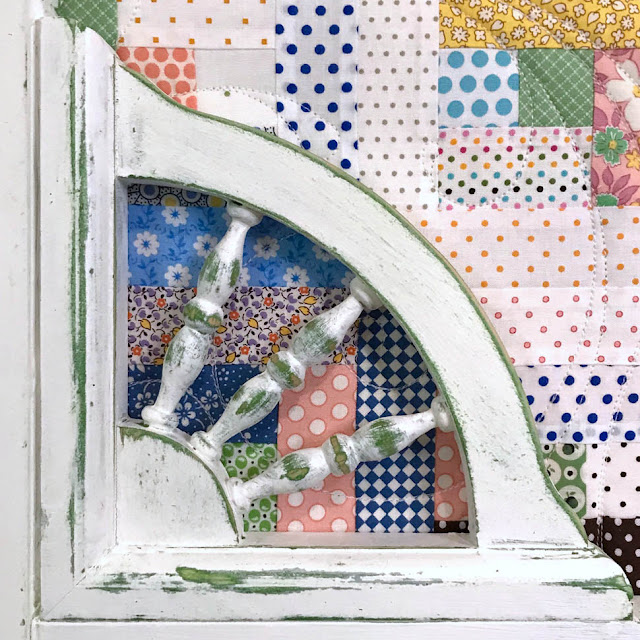
I added extra shelf brackets in the corners of the top opening of the door to dress it up more. I painted the door with a base coat of green then a top coat of white. I sanded the white off in places to distress the paint so the green would show through.

Sliding Quilted Screen Door by Thistle Thicket Studio. www.thistlethicketstudio.com

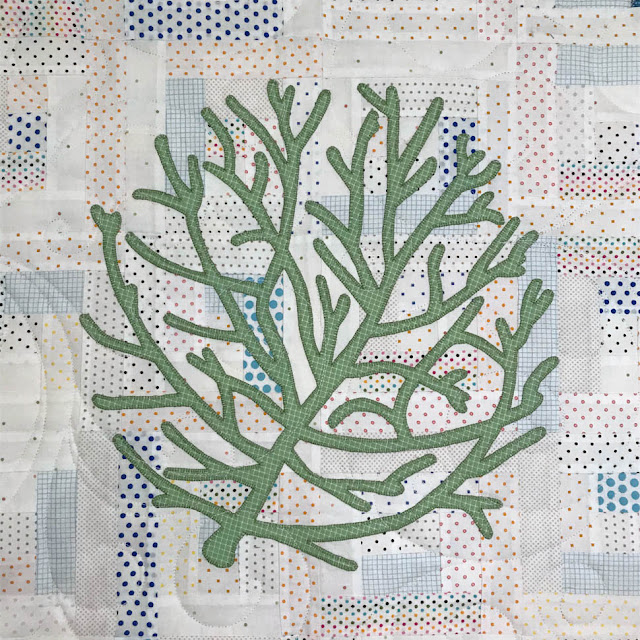
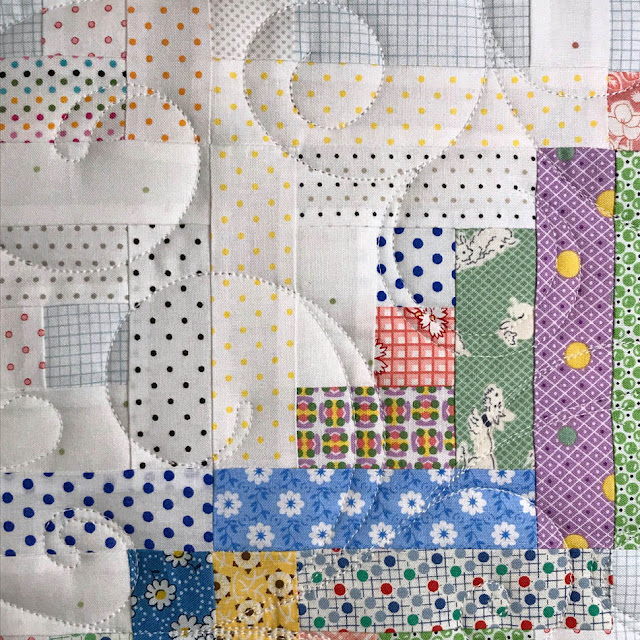
The whole idea of the door is to hide my sewing messes when company comes, so the screen in the door had to go! Of course, replacing the screen with a quilt was a no-brainer in my mind. I used reproduction 30's fabrics and low volume dotted prints on the front side. I chose the log cabin block as it was perfect for framing an applique of my Russian Thistle (tumbleweed) logo in the center.

Sliding Quilted Screen Door by Thistle Thicket Studio. www.thistlethicketstudio.com

I selected an all-over swirly pattern for the quilting design because the back side of the quilt was another pieced top and I wanted a pattern that didn't matter where the design landed on the piecing.

Sliding Quilted Screen Door by Thistle Thicket Studio. www.thistlethicketstudio.com

My mom gave me a set of vintage plastic drawer pulls in my favorite 50's green color so I decided to add some to the door above each of the spindles across the center bar. So cute!

Sliding Quilted Screen Door by Thistle Thicket Studio. www.thistlethicketstudio.com

I just love how the door turned out! And it looks great with my other summer project that I finished - my vintage bead board chair rail border. You can see a bit of it on either side of the door in this photo. I'll have to share more photos of that project another day.

And now for the back side of the door. It turned out just as great but with a totally different look!

Sliding Quilted Screen Door by Thistle Thicket Studio. www.thistlethicketstudio.com

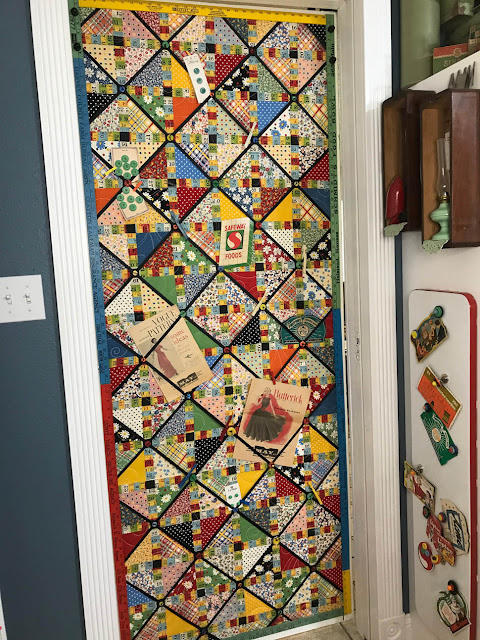
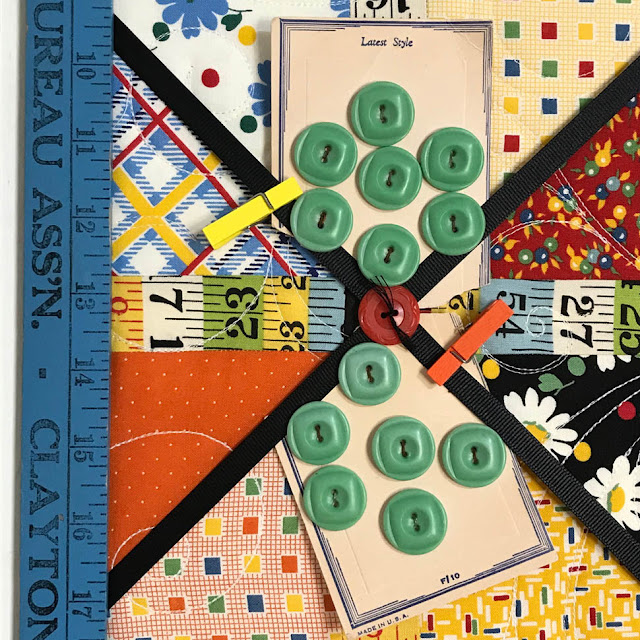
The back side of the door faces into my sewing studio so I wanted a quilt design that I could use my favorite American Jane tape measure fabric. I also wanted to be able to use the space to display some of my vintage needlebooks and other little notions so I decided to make half square triangle blocks and sash them with the tape measure fabric. I then was able to attach black ribbon on the diagonal seams of the HST blocks and secured the ribbons with vintage buttons at the intersections. I hid the raw edges of the quilt and all the staples used to attach the quilt to the screen door with a variety of brightly colored yard sticks.

Sliding Quilted Screen Door by Thistle Thicket Studio. www.thistlethicketstudio.com

Sliding Quilted Screen Door by Thistle Thicket Studio. www.thistlethicketstudio.com

I can tuck lots of different vintage notions under the ribbons as long as they are flat, like these vintage needle books.

Sliding Quilted Screen Door by Thistle Thicket Studio. www.thistlethicketstudio.com

Or some of my cards of vintage green buttons. For added security, I also used little clothespins to clip them to the ribbon.

Sliding Quilted Screen Door by Thistle Thicket Studio. www.thistlethicketstudio.com

You can see one of the yardsticks used to cover the edges of the quilt on the left side of this photo.

Sliding Quilted Screen Door by Thistle Thicket Studio. www.thistlethicketstudio.com

Sliding Quilted Screen Door by Thistle Thicket Studio. www.thistlethicketstudio.com

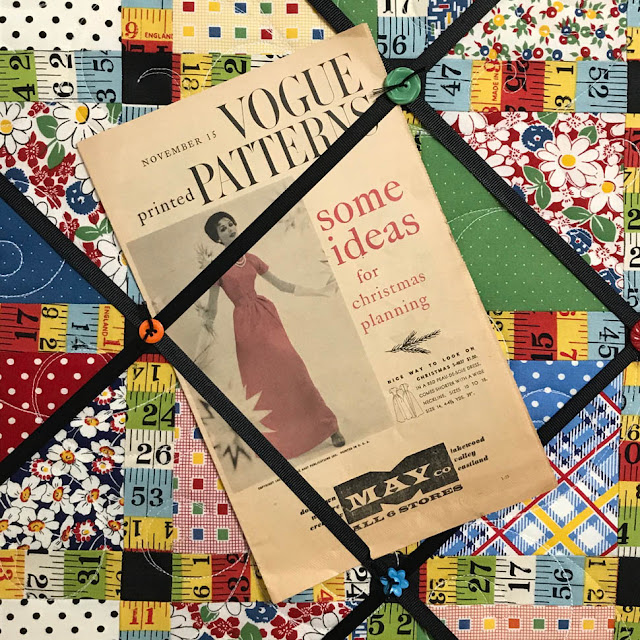
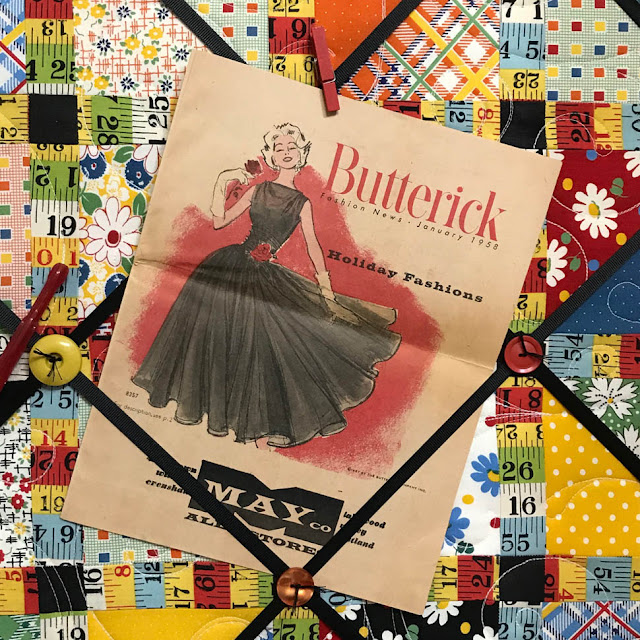
My latest purchase is a group of vintage pattern advertisement booklets from the 50's and 60's. Most were too large but I managed to display a couple on my door.
Sliding Quilted Screen Door by Thistle Thicket Studio. www.thistlethicketstudio.com

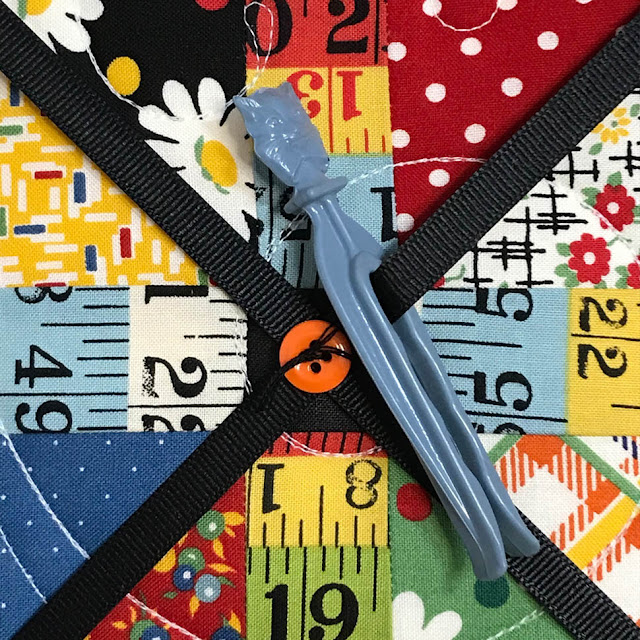
I also clipped a few of my vintage plastic clothespins on the ribbons too. Isn't this cat head clothespin the cutest?!

Sliding Quilted Screen Door by Thistle Thicket Studio. www.thistlethicketstudio.com

It feels so good to get this project finished! Now I need to get my sewing room straightened up so I can have some quilty friends over to show it off!

Happy Quilting!

~Sharla

Leave A Comment