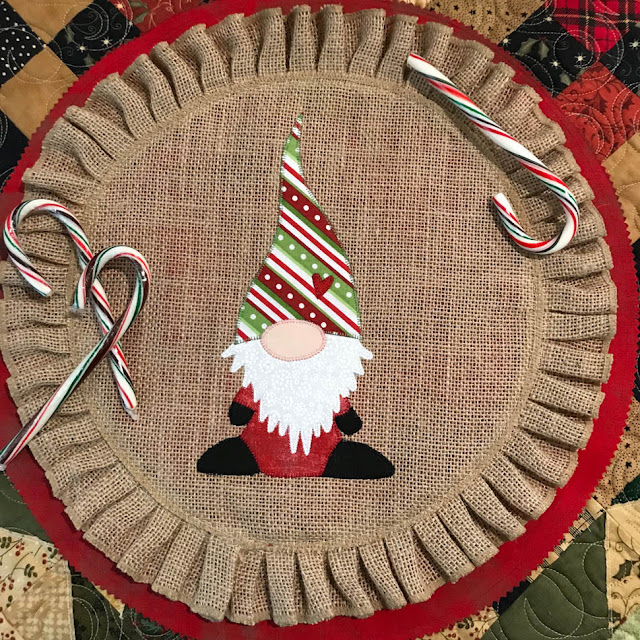
Now that Christmas Day is over, I can share one of the gifts I made for my sister-in-law. She loves gnomes - or at least I hope she does as she received several for Christmas this year! - so I decided to make a burlap table topper appliqued with a gnome. Similar to my Stan The Snowman table topper I shared on the blog a couple of weeks ago, this is Norm The Gnome.
I used another ruffled burlap circle that I picked up at Michaels and backed it with a circle of fabric and stabilizer. I think he turned out cute. I have one more burlap circle left that I think I'll try couching a design on with my long arm using chenille yarn.
I hope each of you had a wonderful holiday and I wish you much happiness in the new year! See you in the new year!
~Sharla
Thursday, December 26, 2019
Tuesday, December 17, 2019
Christmas Crafting: A Vintage Ornament Wreath
I had the crafting itch this weekend and decided to make another vintage ornament wreath for the holidays using some of the ornaments I found while hitting up estate sales in Texas this fall. This is my second vintage ornament wreath I've made, the first one I made a few years ago and shared my process on the blog here.
Doesn't my wreath look great with this shelf of vintage photos - especially that old photo of me with my little brothers! Too cute! LOL!
I just love decorating with vintage ornaments (& of course, Christmas quilts too!). They are just so festive and bring such a sparkle to holiday decorating. I fill several bowls and vases with vintage ornaments and arrange in tablescapes around my home. Throw a Christmas quilt on a table and fill a bowl with Shiny Brite ornaments to place on top and I'm instantly in the holiday spirit!
The countdown to Christmas is on - only one more week until Christmas Eve!!! Are you ready? I have one more gift to make but need to pick up some fabric tomorrow to complete it. Otherwise, all the presents are wrapped and under the tree. I'm resisting the temptation to do a lot of baking and candy making this year because I don't want all that sugar tempting me to taste test! Of course, next week I'll make our family favorite - chocolate covered cherries, which I've shared here on the blog before.
Since I may not have time to pop on here again before the holidays, let me wish each and every one of you the happiest of holidays! Merry Christmas!
~Sharla
Friday, December 13, 2019
Stan The Snowman
Last night was our quilt guild's Christmas party and each person was to bring a $10 gift for the gift exchange. I decided to make an appliqued table topper for my gift using a round ruffled burlap circle that I picked up at Michaels awhile back.
After looking online for a simple snowman or Santa clipart and not finding what I wanted, I decided to draw my own and Stan the Snowman was born. I sketched him on paper then scanned him into Adobe Illustrator and redrew him with the pen tool to create a pattern that I could share with all of you. I even reversed the pattern so it's ready to draw onto paper-backed fusible. Click here for my Stan the Snowman pattern.
As you can see, I machine appliqued Stan to the burlap and sewed buttons on for the eyes. I backed the burlap with a circle of red fabric and a piece of tear away interfacing on the bottom before I started to applique. After I was finished appliqueing Stan in place, I fused a piece of batting and another circle of red fabric to the back to cover the back side of the applique. I stitched around the fabric circle and pinked the edge. Lastly, I stitched around the burlap circle (to the inside of the ruffle) to stabilize all the layers.
I hope you enjoy my little Christmas gift to all of you. If you make something with it, be sure to share it on Instagram or Facebook and tag me!
~Sharla
Sunday, December 1, 2019
The Wedding Quilt
Whew!!! The last couple of weeks have been a firestorm of activity. The hubby and I returned from our fall trip to Texas two weeks ago to learn that our son and his fiancé had decided to forego the big wedding they had planned in March (long story of venue going bankrupt and closing, etc.) and having a small immediate family wedding during Thanksgiving while we were all there. What??? But I haven't even started the wedding quilt I had planned to make for them! It was time to kick it into high gear!
In a little over a week, I cut, pieced, quilted and bound this 92" x 107" storm at sea quilt called "Our Hearts Will Go On" in the couples favorite color palette of neutrals and black. I didn't think it was possible but determination won out. I even squeezed in a day to quilt my mom's quilt she made for the newlyweds. I had every day planned out of what I had to complete to finish the quilt and everything else that I had to do for the holiday - and then we had to leave a day early because of threatening ice and snow! So I stole minutes here and there while at my son's house before the wedding day to hand sew the binding.
It was a wonderful week of enjoying family and celebrating Thanksgiving, the hubby's 60th birthday (early) and my son's wedding. (Thanks to my friend, Marilyn, for the beautifully embroidered quilt label!)
Although it was a very laid-back week, I think it was still stressful on the couple. I made them let me take a photo of them with the quilt the morning after the wedding before we left for home. Not fair to them because they had just rolled out of bed and looked exhausted and not quite awake yet. So I apologize to them for posting this photo (my new daughter-in-law may shoot me!)
So in all fairness, here's a better snapshot of the happy couple.
Quilt Stats
This quilt was on my Finish-A-Long goal list for this quarter so I'm thrilled to have finished and will be linking it up at the end of the quarter.
Hope everyone had as wonderful of a Thanksgiving week as I did!
~Sharla
In a little over a week, I cut, pieced, quilted and bound this 92" x 107" storm at sea quilt called "Our Hearts Will Go On" in the couples favorite color palette of neutrals and black. I didn't think it was possible but determination won out. I even squeezed in a day to quilt my mom's quilt she made for the newlyweds. I had every day planned out of what I had to complete to finish the quilt and everything else that I had to do for the holiday - and then we had to leave a day early because of threatening ice and snow! So I stole minutes here and there while at my son's house before the wedding day to hand sew the binding.
It was a wonderful week of enjoying family and celebrating Thanksgiving, the hubby's 60th birthday (early) and my son's wedding. (Thanks to my friend, Marilyn, for the beautifully embroidered quilt label!)
Although it was a very laid-back week, I think it was still stressful on the couple. I made them let me take a photo of them with the quilt the morning after the wedding before we left for home. Not fair to them because they had just rolled out of bed and looked exhausted and not quite awake yet. So I apologize to them for posting this photo (my new daughter-in-law may shoot me!)
So in all fairness, here's a better snapshot of the happy couple.
Quilt Stats
- Pattern: "Our Hearts Will Go On" by The Fabric Addict
- Size: 92: x 107" (I added a larger border to make the quilt bigger)
- Fabric for Top & Binding: Grunge by Basic Grey for Moda in assorted neutral colors
- Backing Fabric: Grunge Dots by Basic Grey for Moda
- Thread, Piecing: Aurifil 2310
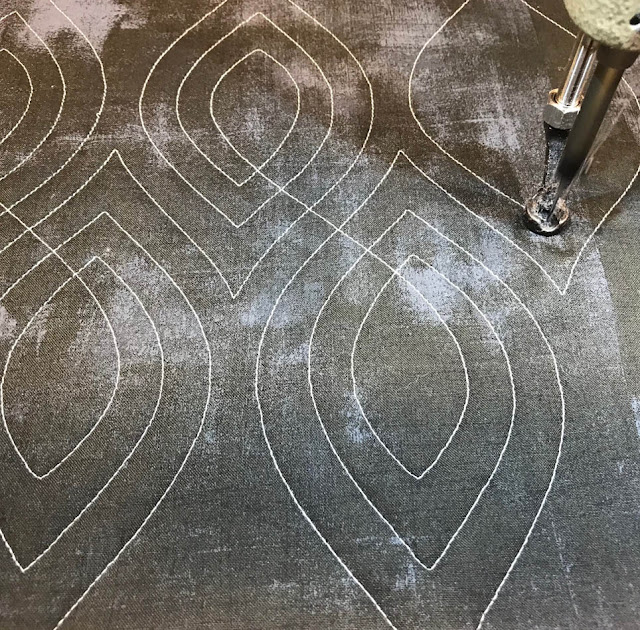
- Quilting Pattern: IKat #1 by Patricia E. Ritter on Urban Elementz
- Thread, Quilting: Signature 100% Cotton Thread in Parchment
- Batting: Hobbs 80/20
- Longarm: Gammill Statler Stitcher
Hope everyone had as wonderful of a Thanksgiving week as I did!
~Sharla
Subscribe to:
Comments (Atom)


