As of the beginning of the year, my mom and I assumed roles as the officers of our local quilt guild (me - president, she - secretary/treasurer). We've been doing lots of planning and yesterday was our first month's meeting. One of the things we planned was to get everyone's creative juices flowing by making confetti mini quilts. Although it made for a long evening, I think those that participated had fun.
Have you made a confetti quilt? They are really quite easy and fun to do - and you don't have to be a fine artist to make a beautiful quilt. I snapped a few photos as I made my class sample so I thought I'd share how I made my confetti quilt.
I chose to make a fall scene of a tree with falling leaves because I thought it would be the easiest for the participants to make. I used batiks in the making of my quilt because the 'confetti' needs to be from fabrics that are the same color on both sides. Solid woven fabrics will work also.
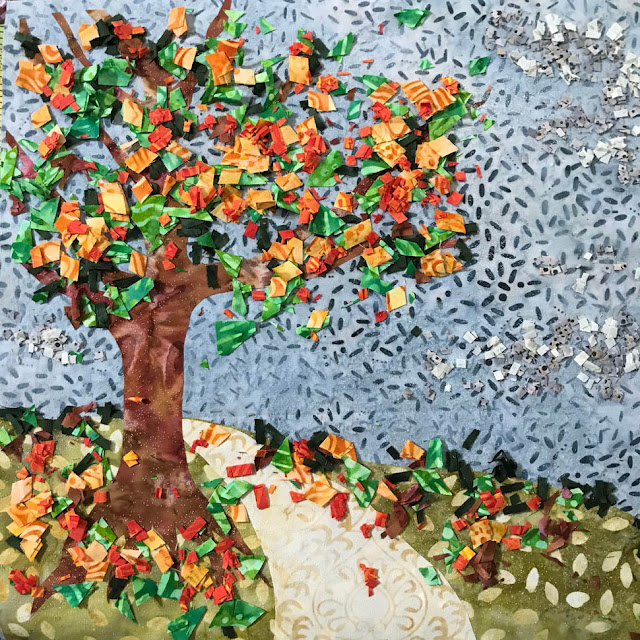
I selected a light blue-gray fat quarter for my background and cut it into a 12.5" square. I then drew a design for my foreground elements of the ground, path and tree trunk/branches on to paper backed fusible web and fused the shapes to my selected batik fabrics. I cut them out and then fused them to my background fabric.
It was then time to make my confetti! I selected a range of colors from dark green to bright gold to create dimension in my quilt. I cut my confetti into different shapes to add different textures. For some, I used a ruler to cut little strips and then cross cut the strips into little squares, triangles and rectangles. Then for others, I just put a pile of scraps on my cutting board and started running my rotary cutter across the scraps cutting free-form shapes. Ribbons and specialty yarns can be used to add additional texture in the confetti.
Before beginning to place my confetti on my background, I sprinkled a powder adhesive called Bo Nash on my fabric in the areas that I was going to place my confetti. The powder, when pressed with a hot iron, helps fuse the confetti to the background to stabilize it for quilting. After the powder adhesive was applied, I began placing my confetti starting with the darkest color first, then layering each color from darkest to lightest. This help creates depth in the quilt because the darker elements recede while the lighter elements appear to be closer.
Once I had my confetti in place, I very lightly sprinkled a little more powder adhesive on top of the confetti, then placed a piece of tulle netting over the entire quilt top. Placing a silicone pressing sheet over the entire surface, I pressed it using an iron on a wool setting and no steam. The iron should be hot enough to activate the powder adhesive but not so hot that it melts the netting. The powder adhesive holds everything in place enough to be able to quilt the piece.
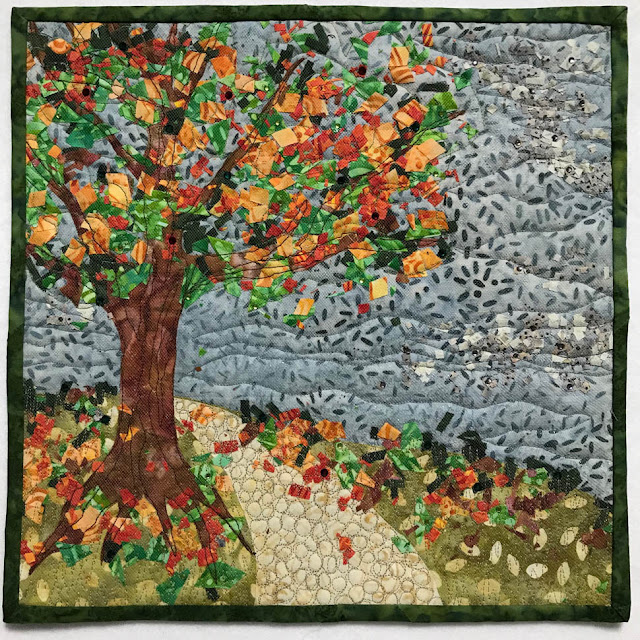
I layered my top, batting and backing and set out to quilt this on my domestic sewing machine. I used Thermore for my batting because it is thin. Although my machine does not like to do free motion quilting, I tried it on this quilt. I had some issues with skipped stitches and had to do some ripping, but I finally adjusted the tension enough so that the skipped stitches were seldom and not noticeable. I'm not a freehand quilter, but I was pretty pleased with my quilting on this.
I finished off my quilt by placing some hot fix crystals on top of the quilt in red, dark green and light green in the leaf areas to add a bit of interest (and because they were just lying around, left over from another quilt project).
Ta-Da! I have a new quilt to add to my mini quilt wall! It was a fun little project and really easy to do. The hardest part was hand sewing the batik binding to the batik backing with the dense quilting! If you try your hand at making a confetti quilt, I hope you'll come back and share it with me!
~Sharla


That turned out so well! I actually liked the background before you started even adding leaves. It was a great winter day look at the same spot! Make 4 and go for all four seasons?
ReplyDeleteLove your confetti quilt. My guild, I finally joined, is having a workshop for this in February, so it is good to see yours
ReplyDelete