Believe it or not, my Farm Girl Vintage blocks are finally completed! I've had so much fun with this sew along and want to thank Lori Holt of Bee In My Bonnet for all the fun - and for asking me to be a guest blogger for one of her blocks.
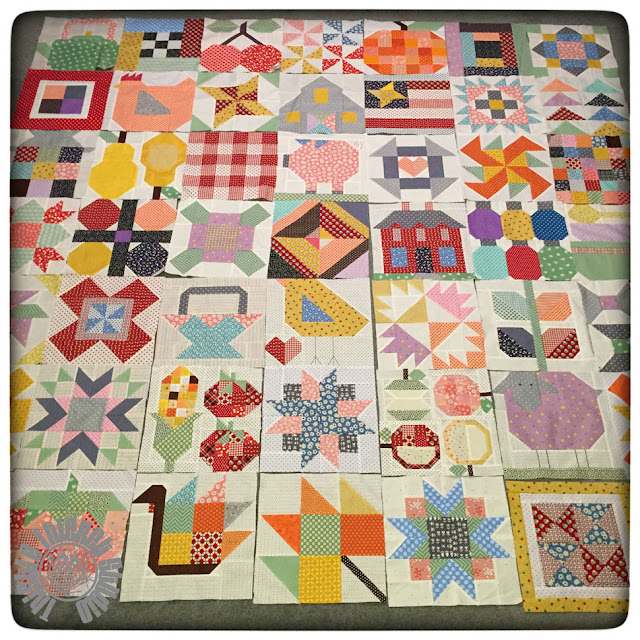
I purchased Lori's companion blocks that she has available through the Fat Quarter Shop to round out my set of blocks instead of making duplicate blocks. I made a total of 49 12" blocks to make a 7x7 layout. I haven't decided how big of a border I will add, but the quilt should finish out somewhere around 100" square.
I made my own Apple Picking block, combining blocks in Lori's Apple Picking Quilt pattern and her apple core block from her "Quilty Fun" book. I am so happy with how this one turned out!
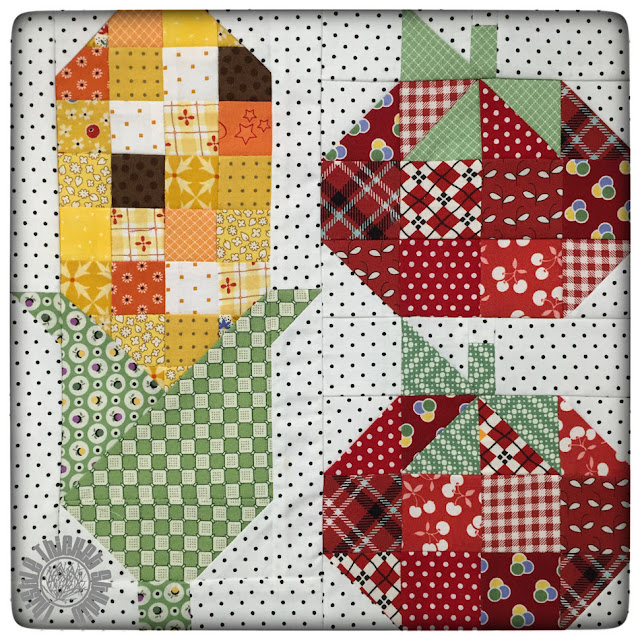
I just loved the Corn and Tomatoes block when I saw Lori post it on Instagram during one of her retreats and knew I just had to have it in my quilt. Although we don't raise corn (or tomatoes for that matter) on our farm, there is a lot of corn raised in western Kansas. For my block, though, I decided to make it Indian corn!
For the last block, I found this free Tom Turkey block on Lori's blog and thought he would fit right in with the rest of the barnyard animals in my quilt. He's legless right now, but I'll get him some legs soon!
I couldn't wait to lay all of the blocks out to see how they played together. I just love all the happy colors!
Even standing on a ladder I couldn't fit all the blocks in this photo. Next up will be sashings and corners and finally a border. I'll share a finished photo when its quilted and bound - but who knows when that will be!
Hope you've enjoyed following along with my Farm Girl Vintage Sew Along. Now back to working on some of those UFOs I had planned on finishing this year!
~Sharla
Monday, October 26, 2015
Saturday, October 24, 2015
Bonnie & Camille Log Cabin Swap Update
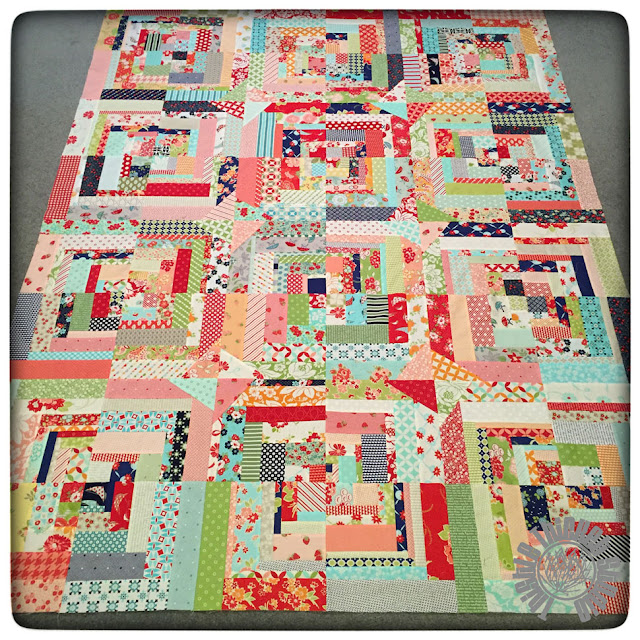
What do they say about the best laid plans? "The best laid plans of mice and men often go awry." That sums up my plans lately, for sure! What do I do when my plans go awry? I sew! Although I had other plans, I was stuck on the farm the last few days because we received a wonderful rain (as farmers, you never complain about rain!) and the roads were muddy. The good news is I had time to finish my Bonnie & Camille Log Cabin Swap quilt top!
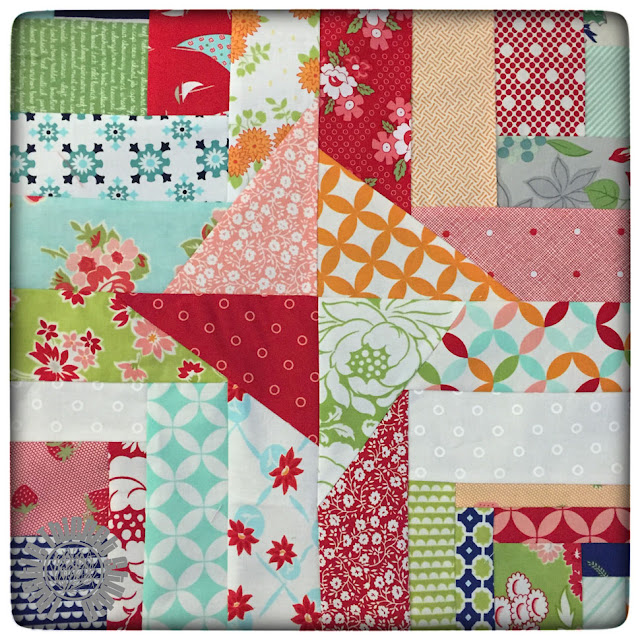
I wanted to change up the look of the layout a little bit so I decided to add spinning pinwheels or whirligigs (I've heard them called both) to the corners of my log cabin blocks. I like the finished effect.
As I worked on this quilt, I wondered about where all my swap blocks originated. There were 175 participants in the swap, from 10 countries and 42 US states. I wondered about the quilters, where they live, what type of work they do, and why they quilt. I received one block that was labeled. It came from Woolmarket, Mississippi. Wouldn't it have been fun if we all would have labeled our blocks. I will definitely remember to do that for the next swap. If you participated in this swap, leave a comment and your IG name! I would love to connect with you on IG!
The top finished at 57" x 76" and will make a nice throw quilt. It's now folded and in the stack of quilts to be quilted. I don't have backing or binding fabric, so I guess that gives me an excuse to hit a few quilt shops in search of the perfect B&C fabric!
~Sharla
Sunday, October 18, 2015
Fall Pumpkins & Burlap Flowers
Remember that wood I purchased and made a couple of chalkboard pumpkins for my grandsons with the left over wood? Well, I finally finished the project that I originally bought the wood for! More fall pumpkins, but a little more sophisticated than those I made for my grandsons.
I saw a photo of similar pumpkins on Instagram made by Nina at Mostly Made In The South - only they were orange - and I just loved them. Nina makes the most awesome painted signs, so stop by her website and check them out! So here is my version of Nina's pumpkins. I painted them an off-white for a more upscale, neutral look.
They were quite easy to make. I used 2x8 pine boards cut at 15", 18" and 21" lengths. I sanded them, then cut a couple of slits down the front to give the feeling of the pumpkin ridges and drilled a hole in the top for the stem. I painted them, sanded them a little for a worn look, then stained them and finished them off with a spray acrylic satin finish. I cut sections of fallen tree limbs and inserted them for the stems. I decorated each of them with burlap and osenberg flowers that I made.
I really like the way the flowers turned out. I searched 'how to make fabric flowers' on Pinterest and found several tutorials. From there I kind of came up with my own designs, combining different techniques I'd seen. I topped some of them off with antique brass buttons.
I ended up making three sets of three pumpkins - one for me, one for my mom and one for a gift. I can't wait to give them (my mom is coming by later today)!
What crafty fall decorating items have you made?
~Sharla
Monday, October 12, 2015
Mini Mini Quilts
In my sewing studio, I have this wall of white closet doors. Very stark, very plain, white wall of doors.
On Instagram, I've been seeing photos of the cutest little quilts. Teeny tiny little quilts. Mini mini quilts.
Brainstorm! I've decided I'm going to make that very plain white wall of doors into my mini wall of quilts! So this weekend I made my first mini mini. It measures 6" x 6". It is a plus quilt. I've been wanting to make a large one, but that's just one of many on my list of want-to-dos. I made my mini mini from scraps from my Farm Girl Vintage Sew Along. They were so tiny - 1" squares - that they were really not even scraps, just snippets.
Not all of the plus signs line up, but it's not bad, I guess, for my first attempt. I kind of like it - wonky and all.
I put hanging corners on the back and cut a scrap piece of yardstick to slide under the triangles and then used double stick foam tape to secure the yardstick to the closet door.
But one little mini mini quilt looked lonely on that big expanse of white. So, I made another. A 4" mini mini. Again I used scraps from the sew along and I used Lori Holt's little heart pattern from her book "Farm Girl Vintage".
Connecting the two ends of the binding on such a little quilt was a wee bit difficult and if I make anything smaller, I will have to use a different binding method.
There, that's better. My mini mini plus quilt doesn't look so lonely! I think it would look really cute to make a 2" mini mini mini to finish off this little row of quilts!
Each section of these doors are 18" wide, so I think I'll maybe make some of Thimble Blossoms' mini quilts too. I just love her wall of mini quilts in her studio and some larger mini quilts will add some variety on my wall.
On Instagram, people are swapping mini mini quilts. I have a quilt blogger friend from the UK, Helen of Midget Gem Quilts, and we are going to swap minis - after we each finish some other things that are currently on our plates. I can't wait. I already have my idea for her mini mini. Maybe I can sneak it in on my plate this week after all!
Have you made a mini mini yet?
~Sharla
Friday, October 9, 2015
Farm Girl Vintage, B&C Log Cabin Block Swap & More Fall Decorating
Well, it's finally here. The last two Farm Girl Vintage blocks. It's been a fun ride. Kind of sad to see it end - well, maybe not quite yet. I am going to make two extra blocks (I already made one - the Penny Pig) using Lori Holt's pdf patterns from the Fat Quarter Shop so that I have 48 blocks to complete my quilt.
Here are the last two blocks in the sew along. First up, the Winter Star block:
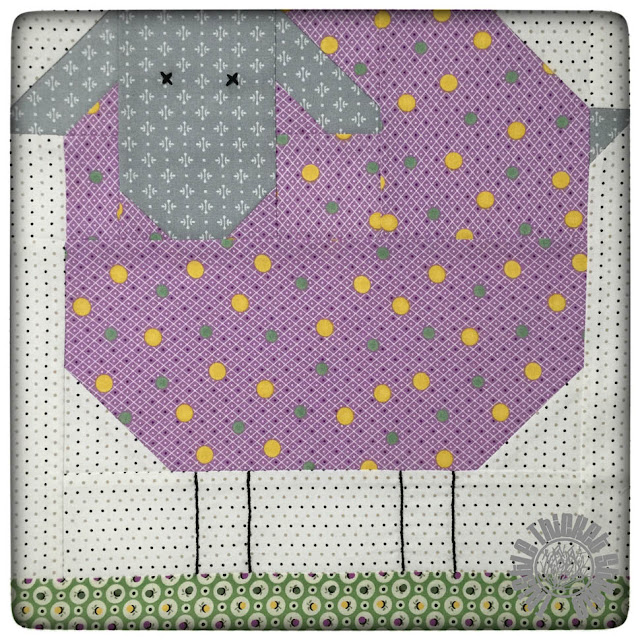
And lastly, the Woolly Sheep block:
Lori is promising more Farm Girl Vintage sew along fun. Maybe she'll reveal what she has in mind today on her Bee In My Bonnet blog! I can't wait to find out!
I thought I was done decorating for fall, but I had this issue I needed to tackle. I have already started to accumulate a stack of Christmas presents on the dining room table because this old farm house doesn't have a lot of storage. So I decided to wrap them in brown craft paper and incorporate them into my fall decorating!
I have wrapped gifts in craft paper for years because it's so versatile. You can dress it up or dress it down. The last couple of years I've decorated for Christmas with a red, chartreuse-y green (is that a word?) and brown theme, so I used brown ribbon on the gifts I wrapped so they will transition from my fall décor to Christmas décor. I piled them in an old barnwood wheelbarrow, added a couple of rusty metal pumpkins and some burlap leaves and tucked it all in an odd space in my entry way. Ta-Da! A clean(er) dining room table and another festive fall vignette to greet guests.
Lastly, and maybe the most exciting.....My Bonnie and Camille Log Cabin Block Swap blocks arrived this week! Wow, what a fast turn around time as the deadline to ship was October 1. The hosts for this swap shared some final stats on this block swap - 175 participants, 6300 blocks, 10 countries, 42 US States! What an undertaking for the two hosts!
Now I'm searching for layout ideas. This is a quick shot of my blocks laid out in the 'traditional' log cabin style. Did you participate in this swap? What layout are you using? Anyone that's seen other layout options, please share!
~Sharla
Monday, October 5, 2015
Chalkboard Pumpkins Tutorial
I've been in the fall decorating mood this past week. I think its because I've seen such darn cute fall décor photos on Instagram and Pinterest, and it makes me want to get crafty. So I headed to the local lumber yard for some wood to make a set of three wooden pumpkins that I'd seen somewhere recently. They were nice enough to cut my 2x8 down to the sizes I needed. I ended up with 30" leftover and I had them cut them into 10" pieces for smaller pumpkins.
Of course, instead of working on the pumpkins that I had the wood cut for originally, I got a brainstorm for those leftover pieces. My finished product ended up being a couple of cute chalkboard pumpkins for my grandsons.
These were a quick and easy little project. I've jotted down some instructions so you can make some too:
Now back to my original pumpkin project! Happy Fall Ya'll!
~Sharla
Of course, instead of working on the pumpkins that I had the wood cut for originally, I got a brainstorm for those leftover pieces. My finished product ended up being a couple of cute chalkboard pumpkins for my grandsons.
These were a quick and easy little project. I've jotted down some instructions so you can make some too:
- Cut wood to your desired size. I used 2" x 8" x 10" pieces of pine.
- Sand the wood pieces. I didn't sand them until they were smooth as glass because I wanted a rustic look and also because I hate sanding, even with power tools.
- Drill a hole in the top of the board for the stem. I used pieces of a tree branch, but you can also use a dowel rod. The pieces are approximately 4" long. I just eyeballed a size that I liked.
- Tape off the front section that will be the chalkboard. I covered the entire area.
- Paint the wood pieces orange. I used acrylic craft paint. It took two coats to get a good coverage.
- Sand the edges of the pumpkin to distress it. Do not remove the tape covered front.
- Stain the painted areas of the pumpkin. Wipe off the excess stain to your liking. I used a dark walnut color.
- Spray a coat of sealant on the paint. I used a satin finish polyurethane.
- Remove the tape from the front and retape the edges of the painted area.
- Paint the front with chalkboard paint. It takes 2-3 coats.
- Remove the tape. You can paint little details around the edge of the chalkboard. I'm not an artistic painter, so I made some simple dots and lines in green to give it a little color.
- Glue the stem in the hole.
- Tie a raffia or jute bow around the stem.
- Draw a cute jack-o-lantern face, fun saying, initial or other design with chalk.
Now back to my original pumpkin project! Happy Fall Ya'll!
~Sharla
Friday, October 2, 2015
Fall On The Farm & Farm Girl Friday
I'm back at it - sewing my Farm Girl Vintage blocks as we near the end of this sew along. I finished up the other block from last week and was ready to tackle the last two blocks in this fun quilt.....but guess what?! Lori Holt announced on her blog, Bee In My Bonnet, today that she is extending the fun! I can't wait to see what she has in store for us!
I didn't get to share my Welcome block last week since I was the featured blogger for the Water Turn block. If you missed my post, you can see it here.
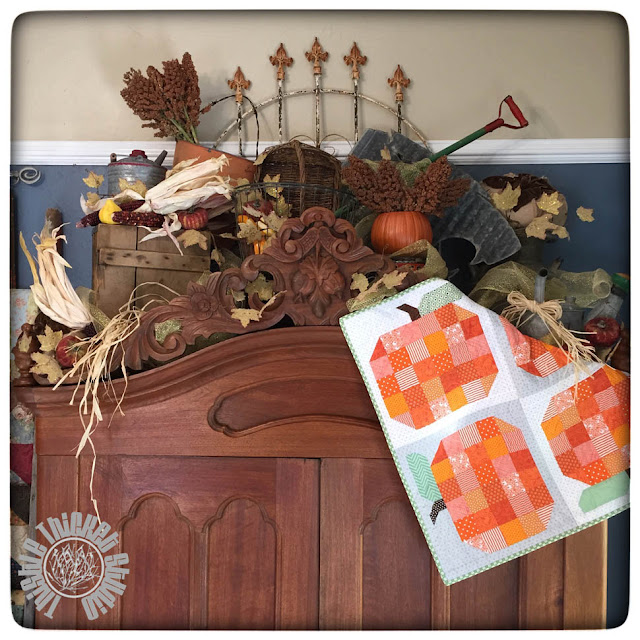
I took a little break last weekend to do some housecleaning and a little fall decorating. I just love to scrounge around in the barn for rusty & weathered junk to decorate with! A rusty gate, some wooden boxes, a few galvanized cans, and of course my corrugated tin Power Cat (Go KSU!) arranged with some fall leaves, pumpkins and milo tucked about and you have a festive fall vignette fit for any entryway!
Of course I had to add my Farm Girl Vintage pumpkin quilt too! I just love this old wardrobe. My hubby's great-grandparents brought this to western Kansas in a covered wagon when they homesteaded here on our farm. My hubby is the 4th generation to live and raise crops on this farm.
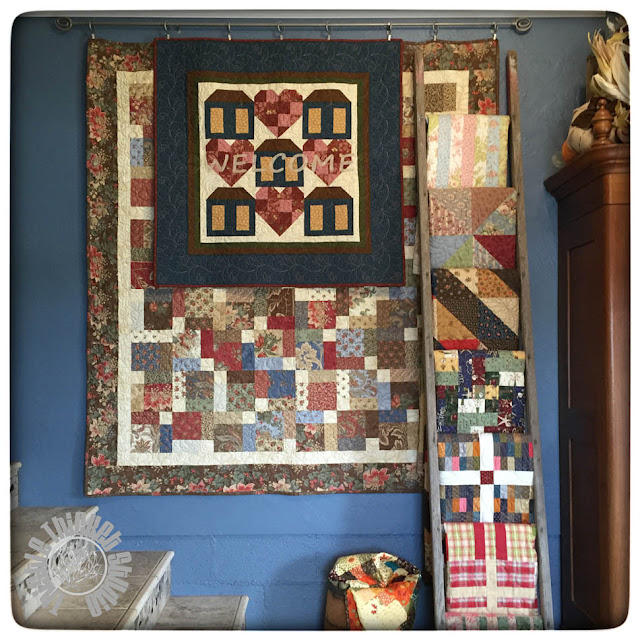
It all looks so great next to my old weathered ladder sporting an array of quilts.
The hubby says its a sign I have too many quilts when I have to start hanging them in layers, lol! But seriously, can a girl have too many quilts?
I didn't get a chance to share the little fabric box I made last week. My quilty peeps got together for a day of fun and we each made one. This will look so cute in my studio with some tools in it. I think I'll make some to fit a loaf of bread and give them as Christmas gifts! Seaside Stitches shared a great tutorial on how to make them.
Today I'm in the barn working on some cute wooden pumpkins, so check back next week for a peek at my latest crafty project!
~Sharla
Subscribe to:
Comments (Atom)


