Saturday, June 27, 2015

Farm Girl Vintage & Wheat Harvest

Wheat harvest is in full swing here in western Kansas, so I didn't think I'd get the chance to work on my Farm Girl Vintage blocks this week. But it rained Thursday night and it was too wet to cut on Friday so.......guess what I got to do?!

It's week 9 of the Farm Girl Vintage Sew Along and we are now one-third of the way through the blocks. This is going by so fast, we'll have all 45 blocks completed in no time! You can visit Lori at Bee In My Bonnet to see her blocks and all the different ways she uses them - she's so creative.

Here are my blocks for this week.....
By Thistle Thicket Studio
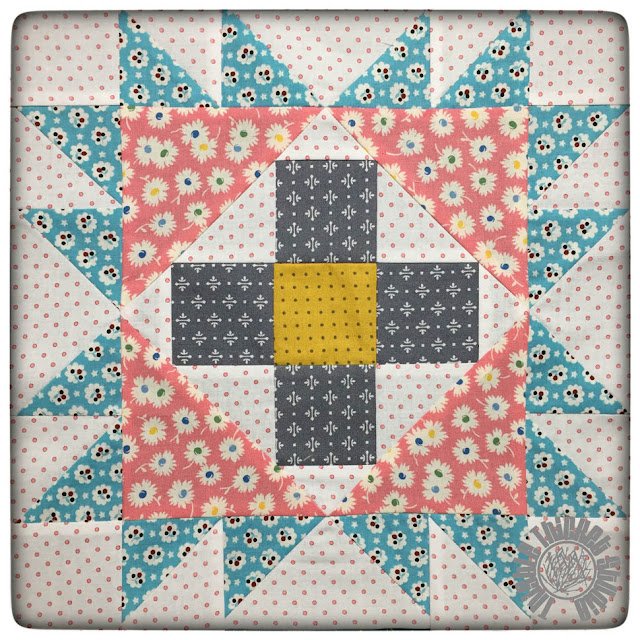
This is the Feed and Seed block. I thought how Lori arrived at the on-point plus in the center of this block was quite clever and very easy. I love the instructions for the blocks in her book "Farm Girl Vintage", she makes them all so easy!

By Thistle Thicket Studio
And this is my Fresh Pears block. I still have to embroider the seeds in the right pear, but wanted to share with you now. I kind of wish I would have made my pears green instead of yellow, but they should add a bit of pop to my quilt. This is all of the sewing I had time for this week because of.......

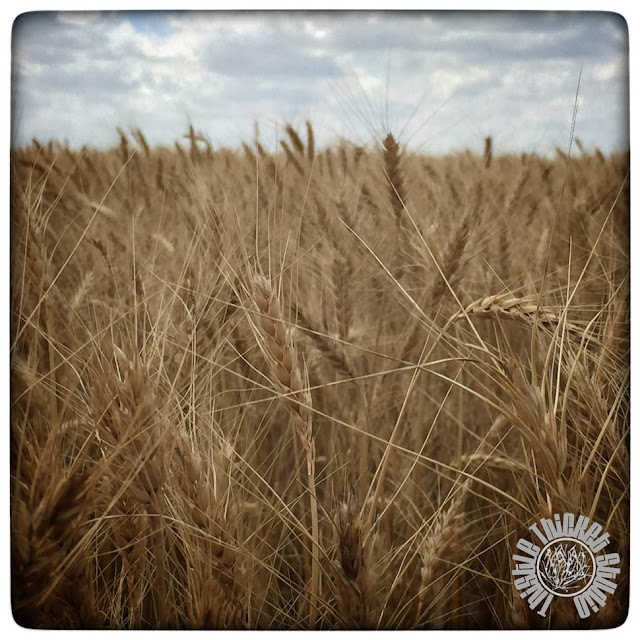
Wheat Harvest! I thought I'd show you a little bit of this vintage farm girl's life this week.
By Thistle Thicket Studio
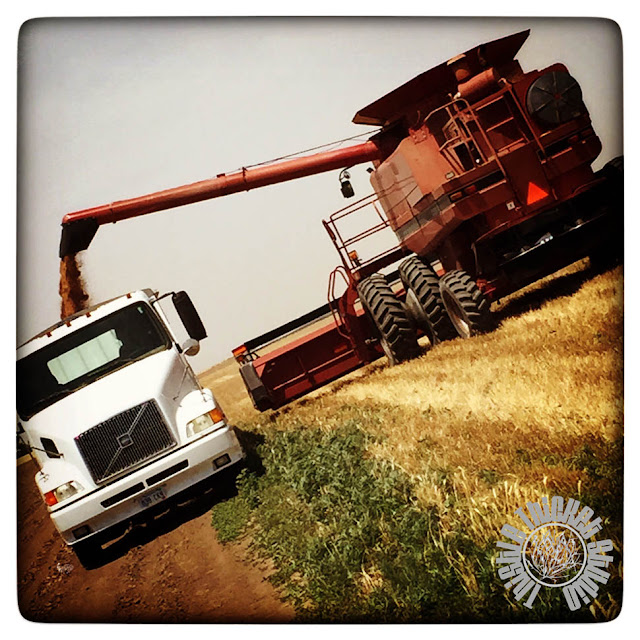
Day 1 - I'm the combine driver in this two-person operation. The hubby does everything else! It gets a little monotonous driving the combine for hours and hours, but it gives me lots of time to plot my next quilt projects in my head.

By Thistle Thicket Studio
Day 2 - Dumping the combine into the grain cart 'on the go' is a lot easier now with the invention of auto-steer. A lot of things have changed in the last 36 years since I married my farmer.

By Thistle Thicket Studio
Day 3 - The equipment has sure gotten larger since I first became a farm girl!

By Thistle Thicket Studio
Day 4 - With almost a half inch of rain and cloudy skies, there was no cutting done. A day of rest - and sewing - was kind of welcomed.

And now it's Day 5 - and the farmer hubby is ready to head to the field. No more quilting and blogging for me for the next few days. The weather forecast is for hot and dry days, perfect for wheat harvest!

~Sharla

P.S. Thanks to everyone who visited my blog this last week during the 2015 New Quilt Bloggers Blog Hop. I've tried to reply by email to everyone who has left a comment (unless you are a no-reply blogger), and I apologize if I missed anyone. Just know that I really appreciate all the comments. It's been a really fun experience!

Sunday, June 21, 2015

My Turn on the 2015 New Quilt Bloggers Blog Hop!

Welcome quilty friends! I'm so glad you stopped by to visit me for the 2015 New Quilt Bloggers Blog Hop! If you're not familiar with the blog hop you can read more about it in this post here.

This group of quilt bloggers have been divided into hives. I'm in the Quantum Quilters hive and there are three of my fellow hive members who are on the blog hop this week too, so be sure to read all the way through for their links and the links for our hive hosts who are giving away great prizes throughout this blog hop!

Since it's my turn on the blog hop, let's start with a little bit about me....... I learned to sew in 4-H and made some of my clothes as a teen, I even made the bridesmaid dresses for my wedding! I tried to embroider and hand quilt a baby quilt before my first child was born that became my first UFO (it disappeared when we moved to the farm and have never found it). My second attempt at quilting was in the mid-1990's. I made a handful of quilts for myself and family, then got busy with life (two kids, a husband, a farm, a job as county economic development director, grant writer, 4-H leader.....) and quilting fell by the wayside. I had accumulated a few UFOs by that time. About 10 years ago, I decided to finish up one of those UFOs to give to my daughter in her new apartment. That sparked a new quilting fever and I finished nine UFOs that year (and started some new ones!). I've been inflicted with this quilting virus ever since - so much so that I was even a partner in a quilt shop for five years. And my UFOs continue to grow! Check out my quilting New Year's resolution about UFOs here.

My hubby and I have lived on the family farm - 4th generation to do so - for the last 20+ years. Our house was originally a one-room basement house that eventually had a ground floor added to it in the 50's. When our two kids were still at home it seemed small and crowded, but now it's just right. Not a lot of area to clean which leaves more time for quilting, crafting and junking! I call it junking, not antiquing, because I don't hunt for fine antiques - my motto is "We lust for rust!" You can check out some of my junking craftiness here.

I started my blog as another creative outlet for my quilting and junking. I tried to come up with an original name that was tied to my country farm way of life. This is a Russian Thistle - or tumbleweed as most call it. They are thick around here in western Kansas. Hence the name - Thistle Thicket Studio - and why there is a tumbleweed in the center of my logo.

I don't really have a quilting style - I love everything from traditional to modern. I make whatever looks interesting or challenging to me, or it may just speak to me through colors. I love puzzles - word puzzles, jigsaw puzzles, etc. - and to me, piecing fabrics together is like putting a puzzle together. To give you an idea of my wide range of quilting tastes, here are a few of my favorite quilts....

This is "Chainlinks" and is a pattern I designed for the Moda Bake Shop. It is my first MBS pattern, but I hope to do more in the future. It features, what I call, a sew-cut-sew technique, similar to the "Disappearing Nine Patch" or the "Disappearing Hourglass". Again, these patterns are like puzzles to me. I love trying to figure out new ways of cutting blocks up and putting them back together. For my "Chainlinks" pattern, click here.

"Monkey See, Monkey Do" is the quilt I designed and made for my first grandchild. It features pictures of each of his family on the tummies of the monkeys. There are also elements on the quilt that are 3-D - floppy legs, hanging jungle vines, and fern leaves.

This quilt, "Whooo Loves Keldon", was made for my second grandson and features family photos again on the tummies of owls. This is an Amy Bradley Designs pattern.


One of my most detailed quilts to date is the "Farmer's Wife" quilt by Laurie Hird - 111 different six inch blocks. I taught this as a class by email to 36 quilters over a 13-month period. Having other people dependent on me each week is probably the only way I finished this quilt top. I still haven't quilted it because I want to take the time to custom quilt each individual block.


My Farmer's Wife quilt top on the combine. Later this week I will be running this big machine through the fields harvesting wheat.

And my Farmer's Wife quilt top draped on the grain bin. Hopefully, with a bountiful harvest, the bins will soon be full.

For this 2015 New Quilt Bloggers Blog Hop, we're suppose to share a couple of tips. My blogging tip is whenever you have a question on how to do something techy with your blog or you have a blog etiquette question, just Google it. If you are asking, other people are asking too, and that means someone else is blogging about it. I have figured out so many techy things to do with my blog by Googling it - and by becoming a member of the 2015 New Quilt Bloggers group! One thing I learned from this group is how to put those cute little heart social media buttons at the top of my sidebar. You can follow me on Facebook, Instagram, Twitter, Pinterest and Bloglovin' by just clicking on those buttons.

My sewing tip is on how to match points at seams. With right sides together, poke a pin through the tip of the point of the first block and then through the tip of the point of the second block that you are sewing together.
With your two blocks together in a horizontal position and the pin stuck through the points at a perpendicular (vertical) position, pin additional pins on each side of your perpendicular pin. This holds the points together without slipping when the perpendicular pin is removed and allows you to carefully sew over the pins when sewing the seam.

Be sure and visit the rest of my fellow quilt bloggers that are in the Quantum Quilters hive:
Then buzz on over to each of our hive hosts for links to the other quilt bloggers in the blog hop this week and to find out how to enter for all the blog hop prizes!
Cheryl @Meadow Mist Designs
Stephanie @Late Night Quilter
Thanks for stopping by to visit me on the blog hop! Hope you'll come back and visit often! One last tidbit about me.....I was born in La Grange, Texas. Do you know what La Grange is famous for? (Did you know or did you have to Google it?) And, no, that's not the reason why I was born there, LOL! So where were you born and what is it famous for?
~Sharla

Saturday, June 20, 2015

Farm Girl Vintage Sew Along - Week 8


It's another Farm Girl Vintage Friday sewing on a Saturday. I was happy to steal away a few hours this afternoon to work on this week's blocks and to start sewing on something special to share later. First here are my two blocks this week....

 This is my Farm Fresh Flower block. Loving that green zigzag for the leaves!

And this is my Farmhouse block, complete with kittens playing in the grass.

I started working on an extra Farm Girl Vintage project to share when it's my turn on the FGV blog hop. I had some Sweetwater "Feed Company" fabric set aside for a different project, but after seeing Lori Holt's (Bee In My Bonnet) blocks using this line, I decided to make my extra project with it too. Don't they say imitation is the sincerest form of flattery? You can check out Lori's "Feed Company" blocks here.
That's all of a sneak peek I'm giving until the reveal on my FGV blog hop day. Can't wait to show you.

Speaking of blog hops, come back and visit me next week (actually, the blogs go live at 11 p.m. CT Sunday night) as it's my turn on the 2015 New Quilt Bloggers Blog Hop.

~Sharla

Tuesday, June 16, 2015

2015 New Quilt Bloggers Blog Hop

If you have visited my blog before, you've noticed lots of new changes (hopefully for the better!) in the last couple of weeks. The changes are the result of my participation in the 2015 New Quilt Bloggers group. Seventy plus quilt bloggers who have been blogging for less than two years are participating. I've learned lots of techy stuff and have met some really great bloggers who love quilting as much as I do. I have really been enjoying it so far.


The real fun, though, for you as a visitor to my blog is the 2015 New Quilt Bloggers Blog Hop that started this week! Each week over the next four weeks, some of the group's participants will be featured in the blog hop (I'm featured next week, so come back and visit me again).

The group has been divided into four 'hives' and I'm in the Quantum Quilters hive. Each hive has a host, Cheryl @Meadow Mist Designs, Stephanie @Late Night Quilter, Terri Anne @Childlike Fascination and Yvonne @Quilting Jetgirl (my awesome host), each posting about several new bloggers for you to check out each week.


This week, the Quantum Quilters being featured are:

Nurdan @Hug-a-Bit Quilts
Ali @Needle Down
Denise @CrafTraditions
Bernie @Needle and Foot

Please stop by and visit each of the Quantum Quilters, then go visit each of the other hosts and visit their hive members too! Be sure to check out how to enter in the blog hop for lots of great prizes too!

I must have been hiding under a huge rock here in western Kansas because I had never heard of Bloglovin' until I started participating in this group! If you've been hiding under that same rock (surely we were having some quilty fun together there) and haven't used Bloglovin', then go check it out! It's a site where you can track all of your favorite blogs and it will post every time one of your saved blog sites has an update. It's how I've been able to keep up with all of my new blogger friends I've meet in the 2015 New Quilt Bloggers group. So my techy tip for you is to get signed up for Bloglovin' then as you visit each of the bloggers in this week's blog hop, add them to your list of bloggers to follow. If you look at the top of my blog on the right hand side, there is a Bloglovin' button where you can sign up - and there are buttons for Facebook, Instagram, Twitter and Pinterest too, if you want to keep up with me on all my social media sites!

Have a great blog hop and I'll see you next week when it's my turn!

~Sharla


Sunday, June 14, 2015

Thread Holder, Do-Rag & More Farm Girl Vintage Blocks

I excitedly wait for Fridays to roll around to see what new and creative ways Lori Holt with Bee In My Bonnet has used her blocks from her Farm Girl Vintage book. Besides all the wonderful quilts, she has made pillows, pincushions, aprons, potholders and more. I still have an apron that I want to make using that extra baking day block I made a couple of weeks ago. Maybe I'll get it done next week....

But for now, I got the next two blocks made. Here is my crops block & my egg basket block.....
I also made the hubby a do-rag to keep the sun off of his head during wheat harvest. It kind of looks like a pile of fabric in the picture so you'll just have to imagine what it looks like on a head. Or, you can check out the free pattern I used here. I have tweaked the pattern to fit the hubby better.

Harvest will be here before I know it, and definitely before I'm ready. We're a two-person operation on the farm during harvest - I drive the combine and the hubby does everything else. That means eating meals on the go and late at night after we are done for the day. I try to make meals ahead of harvest and put them in the freezer so all we have to do is pop it in the oven. Yikes! I need to start planning harvest meals and getting them made!

I also did a little junk crafting. I always have a pile of spools and bobbins of my go-to threads laying by my sewing machine. It's always a mess and every once in awhile one gets knocked off into the trash can. I've had this idea for a spool holder made from yardsticks to match my measuring tape décor/theme in my sewing studio. With a few woodworking tools and a handful of yardsticks, my idea became a reality.
I love how it matches my ironing board cover (and my Thistle Thicket Studio wordle quilt, and my Thistle Thicket Studio sign and my magnetic chalkboard tray)! Maybe this will get me motivated to make my retractable design wall - I plan to use yardsticks for the frame of it too. So many ideas, so little time! Isn't that true for all quilters? What have you been wanting to make but haven't found the time yet?

~Sharla


Thursday, June 11, 2015

My Happy Ooops

I'm steadily trying to keep my New Year's resolution of finishing up some of my many UFO projects. So today I'm so happy to share with you one of my UFO Ooops projects.


This little house and heart Thimbleberries quilt has sat in my unfinished pile for about 5 years now. The top was complete, it just needed to be quilted. It was one of the extra monthly projects for a Thimbleberries Club I taught in 2010.

Recently, my mom, sister-in-law and I took some long arm training on a Gammill Statler Stitcher and we were to bring small projects to quilt. This was one of the projects I took thinking it would be a perfect project to learn how to quilt a border. The plan was to quilt an edge-2-edge design in the center and then quilt a separate design in the large blue border. Things were going great until I had a brain fart (is that ok to say in print?) and instead of putting the length of the center of my quilt as 28", I typed in 38" - Ooops! As soon as the first E2E row was quilted, I realized my mistake. That first row was only a couple of inches shy of the center of the quilt and I still had two more rows to quilt. To recover - without ripping - I decided to quilt the bottom half like the top half, leaving about a 4" space in the middle. Then I quilted an outline of the letters "Welcome" in the center. I was quite proud of my idea, but only mildly happy with the results. I was hoping the quilted "Welcome" would stand out but it was lost in all the other quilting.

After returning home, I had another brainstorm. I decided to thread paint in the letters, filling them in to make them stand out. I've never attempted any free motion quilting, let alone thread painting but decided to give it a whirl. I'm so happy I did because I love the end result.

I'm not even sure that thread painting is the correct term to use, as thread painting is usually done in portrait and art quilts. If you want to learn more about thread painting, you should check out Nancy Prince's website. She's an amazing award winning thread painting quilter.

Have you ever embellished a quilt by thread painting? Do share!

~Sharla

Sunday, June 7, 2015

Farm Girl Vintage Sew Along - Weeks 5 & 6

With a busy week of being on the go, I finally got the chance to sew yesterday. Yea! I was a week behind on the Farm Girl Vintage Sew Along and I hate getting behind. So happy to be all caught up again!


I loved the extra little heart that Lori Holt of Bee In My Bonnet added to her churn dash block so I copied her. You can see her instructions here. I seem to either make blocks with pastel colors or blocks with primary colors. I hope they all blend together well in the end. I think I need more fabrics to mix it up. Shopping time!!

Someone asked me why I have blue tape on my sewing machine table. The truth is I'm lazy and I hate drawing all those diagonal lines on the backs of squares for half square triangles (there's a lot of HSTs in the Farm Girl Vintage Sew Along blocks). So, using a carpenter's square for accuracy, I placed a piece of painters tape down my sewing table that lines up perpendicular with my needle when it's in the center position. I use the edge of the tape to line up the points of my squares and enables me to sew a straight and accurate line diagonally across my half square triangles without drawing a line. It's so quick and easy!

 First, I line up the point of my squares with my needle.

 
Then I line up the opposite point of my squares on the edge of the tape. Then sew, keeping the point on the edge of the tape. It's easy peazy!

Well, except for when you put the wrong colors of squares together and then you have to rip! I really don't have to rip too often though, because Lori's instructions in her book "Farm Girl Vintage" are so clear and easy to follow.

I'm starting to amass a pile of triangle remains from all of these half square triangles. They are anywhere from 1" to 3" in size. I'm thinking about making them into a mini project - am I nuts? How small is really too small? I would love to see other mini half square triangle projects. If you have one, please share in the comments!

~Sharla

P.S. I spent a little time (well, really a lot of time) this week revamping my blog. It's part of a new quilt blog group I'm participating in. I'll talk about it more in upcoming blogs. But I'm really happy with the new, cleaner look.

One of the things I learned from this group was how to make those little red heart social media links at the top right of the blog. Now we can be friends in all sorts of places! I also discovered Bloglovin' from this group. This is an awesome way to track the blogs you like and it will notify you when your favorite bloggers make a new post. Hope you'll start following me on Bloglovin' (and Facebook, and Instagram, and Twitter, and Pinterest too)! 

Please let me know what you think of the new design and how I can make my blog more user friendly and fun to visit.


Wednesday, June 3, 2015

Canning Season - Farm Girl Vintage Sew Along

I love event planning....brainstorming a theme, choosing a color palette, creating the décor to carry out the theme....simple or elaborate, I love it all. I want to share a few pictures from a ladies luncheon that I decorated using a canning jar theme. The inspiration came from two places - the Farm Girl Vintage Sew Along at Bee In My Bonnet and Buttermilk Basin's quilt market photos on Facebook and Instagram.

Just wanted to share a few photos.....


~Sharla