Thursday, December 22, 2016

TBT: Homemade Chocolate Covered Cherries

It's not Christmas at our house until the Chocolate Covered Cherries are made (which I did on Tuesday), so I thought I'd share our family recipe for them for Throw Back Thursday, just in time for you to make some too!
Thistle Thicket Studio, chocolate covered cherries recipe, candy recipe, fondant, Christmas candy

I shared the recipe a couple of years ago on the blog, so I'm sending you back to that post. Just click on this Chocolate Covered Cherries recipe link. Enjoy!

~Sharla

http://www.thistlethicketstudio.com/2016/12/tbt-homemade-chocolate-covered-cherries.html

Saturday, December 17, 2016

Oh {Chippy, Wooden} Christmas Tree

I love decorating for Christmas but there's one place that has had me in a decorating conundrum - my patio pots. I hate seeing them full of dirt and devoid of plants, but what do you put in them in the middle of winter? For a couple of years I have wanted to make some chippy wooden Christmas trees to 'plant' in my patio pots but never found the time - until this week.
Thistle Thicket Studio, wooden Christmas trees, slate trees, rustic trees, bead board

And just in time, as the snow is flying today with temps dipping into the sub-zero range....and let's not talk about the wind chill!
Thistle Thicket Studio, wooden Christmas trees, rustic Christmas trees, slate trees, bead boards

I've been picking up chippy painted bead board planks this past year with this project in mind, but I found a little gold mine of boards on a stop while bringing my mom home after her two month stint in Kansas City hospitals following her car accident. What a trooper my mom is! We had to slide those 8 foot long splintery boards between us for the ride home and she never complained. Thanks mom!
Thistle Thicket Studio, rustic Christmas tree, wooden Christmas tree, bead board, slat tree

These primitive trees were really easy to make. And my miter saw and nail gun made it a quick project too. I just sketched out my ideas for trees on graph paper to determine the length of boards needed.
Thistle Thicket Studio, rustic Christmas trees, wooden Christmas trees, slat trees, bead board

I picked up these little wooden red signs at a local gift shop this week at half off and immediately knew they'd be perfect on some trees.
Thistle Thicket Studio, rustic Christmas trees, wooden Christmas trees, slat trees, bead board

And a couple of those rusty bedsprings found their way on top of a tree along with a rusty metal star.
Thistle Thicket Studio, rustic Christmas trees, wooden Christmas trees, bedspring tree topper, metal star tree topper,

I still have a couple of more tree ideas and a little bit of bead board left, so I hope to make a couple of more trees next week. But the weather will need to warm up just a bit!

What Christmas DIY decorating projects have you been working on?

~Sharla

http://www.thistlethicketstudio.com/2016/12/oh-chippy-wooden-christmas-tree.html


Tuesday, December 13, 2016

Another Finish: Santa Pillow

I finished off another project this past week, although this one I didn't include in my Q4 Finish-A-Long goals - go figure!
Thistle Thicket Studio, embroidery, Santa pillow

Last spring our quilt guild gave a lesson on coloring on fabric for embroidery projects and I picked a Santa pattern to make. I actually finished the coloring and embroidery last summer and set it aside. Last week I decided to finish it off as a pillow to add to my Christmas décor - plus a pillow was a quick and easy way to finish up this UFO and get it off my to-do list!

I think it turned out cute and looks great with my "Have Yourself A Quilty Little Christmas" quilt I finished earlier this year. Wish I could finish off all my UFOs this quickly!

~Sharla

http://www.thistlethicketstudio.com/2016/12/another-finish-santa-pillow.html

Saturday, December 10, 2016

Bedspring Snowmen

Whenever my daughter and I get together, we always plan more things than we can ever pack into our time together. This Thanksgiving was no different. One of the projects we never got around to making was snowmen made from some rusty bedsprings the hubby helped me rescue. Since I had gathered all the supplies and they were taking up space on my cutting table, I decided to make a couple - then box up the rest of the supplies and send them to my daughter. That's one way to get rid of the clutter!
Thistle Thicket Studio, bedspring snowmen, bedsprings, DIY, snowmen, Christmas decor

Except for the bedsprings & old typewriter keys, I found all the supplies to create my bedspring snowmen at that crafters haven known as Hobby Lobby. My supplies included styrofoam balls; snow paint; rusty metal star garlands, snowflakes & bells; small greenery picks; black felt hats; black buttons; a dowel rod to make the wooden carrot noses; and flannel woven ribbon.
Thistle Thicket Studio, bedspring snowmen, bedsprings, DIY, snowmen, Christmas decor

They were really easy to make. The hardest part was getting the snow paint to stick to the Styrofoam balls.

This guy looks so cute on my dining room table mixed in with my Royal Ruby and forest green Anchor Hocking dishes atop my scrappy Icicle Stars quilt.
Thistle Thicket Studio, bedspring snowmen, bedsprings, DIY, snowmen, Christmas decor

I just love these old typewriter keys on this snowman's scarf!
Thistle Thicket Studio, bedspring snowmen, bedsprings, DIY, snowmen, Christmas decor

Stay tuned because I've been doing some other holiday making that I'll be sharing soon!

~Sharla

http://www.thistlethicketstudio.com/2016/12/bedspring-snowmen.html


Tuesday, December 6, 2016

Spell It With Moda Quilt: FAL Q4 Finish #1

WooHoo! I actually have done a bit of sewing - a wee bit. But it resulted in a finish for the 4th quarter of the 2016 Finish-A-Long!
Thistle Thicket Studio, Spell It With Moda, Sunkissed fabric, moda fabric, abc quilt

I started this Spell It With Moda quilt at the beginning of the year while we were camping in Texas, then put it aside when we returned home in the spring. I picked it back up during down times in our never-ending wheat harvest this summer and finished the top.
Thistle Thicket Studio, Spell It With Moda, Moda, Sunkissed fabric, abc quilt, letter quilt blocks

I loaded the quilt on the longarm before we left on our girls Row by Row road trip in August and there it sat while I was in Kansas City with my mom following the accident. I finally quilted it last month when mom returned home after 2 1/2 months in the hospital/rehab. Then, I tucked it away again while preparing for our houseful of guests over Thanksgiving week. This past weekend I finally had the chance to put the binding on and finish it up!
Thistle Thicket Studio, Speill It With Moda, moda, Sunkissed fabric, scrappy backing

Quilt Stats:
  • Quilt Pattern: Spell It With Moda. I altered the pattern and framed each letter block with each block's background fabric.
  • Fabric: Fat quarter bundle of Sunkissed by Sweetwater for Moda.
  • Finished Size: 60" x 60"
  • Backing & Binding: I made a scrappy backing and binding using the left over fabric.
  • Batting: White Quilter's Dream Cotton.
  • Quilting: Quilted on a Gammill Statler longarm using random straight lines set at a -87 degrees, then copying and flipping the lines horizontally to quilt a mirror image of the lines in the opposite direction.
  • Thread: Piecing thread was Aurifil 2024 50 wt. Quilting thread was Signature Solids in White, Oyster Shell, Hot Pink and Daisy.
  • Photo Assistant: The Birthday Boy, my hubby, who is celebrating his 57th birthday today!
I'll be linking this post up to the FAL Q4 link up when it opens. To see my 4th quarter FAL goals, click here.

I kept my Q4 goals small so maybe I'll be able to accomplish more than one this round! Keeping my fingers crossed....

~Sharla

http://www.thistlethicketstudio.com/2016/12/spell-it-with-moda-quilt-fal-q4-finish-1.html


Saturday, December 3, 2016

A Christmas Decorating DIY: Vintage Santa Mug Arrangement

Wow! Did we really just flip the calendar page to December? Christmas is my favorite time of year and I love to decorate, but this year I'm afraid it will be here and gone before I get my tree up. So to help me get into the decorating spirit, I decided to make a little vintage Christmas ornament project. I found a cute little Santa mug while antiquing this fall and it was just begging for me to take him home and deck him out. And today I did!
Thistle Thicket Studio, vintage santa mug, vintage Christmas ornaments, vintage arrangement

I've collected vintage Christmas ornaments for years, so I gathered a few supplies from my stash and made this arrangement in less than 20 minutes. Don't you just love that little bottle brush tree with all the glitter! And I really scored when I found four packages of that vintage tinsel garland this fall!
Thistle Thicket Studio, vintage santa mug, vintage Christmas ornaments, vintage arrangement

First I cut down a styrofoam ball to fit inside the mug and hot glued vintage tinsel garland on the top for the base on which to build the arrangement.
Thistle Thicket Studio, vintage santa mug, vintage Christmas ornaments,vintage arrangement

I used a wooden skewer to poke holes in the Styrofoam for the ornaments and hot glued them into place, placing the taller ornaments in the back and the smaller ornaments in the front. After placing the larger ornaments, I filled in the gaps with the smallest ornaments. Ta-da! The front....
Thistle Thicket Studio, vintage santa mug, vintage Christmas ornaments, vintage arrangement

And the back...
Thistle Thicket Studio, vintage santa mug, vintage Christmas ornaments, vintage arrangement

This makes the cutest little arrangement to tuck on a shelf to add a little Christmas cheer.
Thistle Thicket Studio, vintage santa mug, vintage Christmas ornaments, vintage arrangement

Ho! Ho! Ho! Just what I needed to get me in the Christmas spirit!

~Sharla

http://www.thistlethicketstudio.com/2016/12/a-christmas-decorating-diy-vintage.html

Wednesday, November 16, 2016

Joining The Barn Quilt Craze: DIY Instructions

The dust has been flying as I am in the midst of my annual fall cleaning before the holidays. Since the kids and grandkids are coming home the week of Thanksgiving, I've also been doing a little fall decorating - ok, maybe more than a little, but I want the house to feel festive for the occasion. Even the barn was decked out with the barn quilt I painted last spring - finally!
Thistle Thicket Studio, barn quilt, barn quilts, barn quilt directions, flying swallows

Our local historical society has been making barn quilts for the last couple of years as a fund raiser and this summer our county was declared the Barn Quilt Capital of Kansas. So this spring, a group of our quilty friends got together and made our own barn quilts to join in the fun.

I purchased my barn quilt board kit from the historical society since they were making and selling them. But, they provided us with directions if we wanted to make our own boards:
  1. Use 1/2" MDO plywood or a plywood with one smooth side, cut in 2'x2' for a small quilt or 4'x4' for a large quilt
  2. Use 1"x4" pine and rip 1.38" off lengthwise to be used for backing boards and frame. If making a barn quilt larger that 2'x2', use a whole 1'x4' for backing boards.
  3. Using the wider piece of the ripped 1"x4", cut it into 2-24" pieces. Mount these two pieces on opposite sides of the back of the 2'x2' MDO. Mount using wood glue and staples making sure the outer edges are flush with the plywood edge. Then measure the distance between your mounted 24" pieces and cut 2 pieces of that length from the wider piece of the ripped 1"x4". Mount them on the back of the MDO on the remaining two sides.
  4. The narrow part of the ripped 1"x4" will be cut into 4 pieces, 2-24" and 2-26" pieces for a 2'x2' quilt. These will be used as the frame around the outside edge of your barn quilt.
Thistle Thicket Studio, barn quilt, barn quilts, barn quilt directions, how to paint a barn quilt
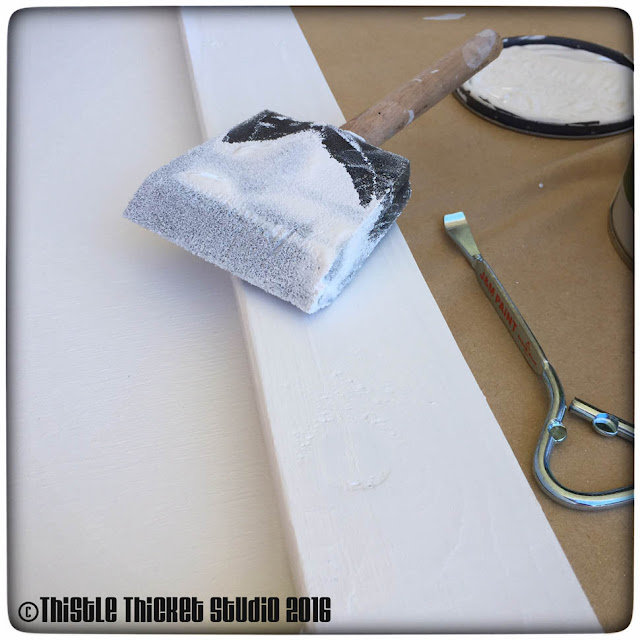
Now that the barn quilt board is made, it's time for some painting fun! Cover all the wood pieces on all sides with at least 2 coats of paint (I used white paint and primer in one). Be sure to use exterior latex paints. I used disposable foam paint brushes as they were the easiest to clean up and cheapest to use.

Thistle Thicket Studio, barn quilt, barn quilts, flying swallows barn quilt, barn quilt instructions
Choosing the quilt pattern was the hardest part of this whole project (well, besides getting the hubby to help me hang my barn quilt when it was done!). I did a lot of searching on Pinterest and finally decided on the Flying Swallows quilt block pattern. I sketched out my design on grid paper first.

Thistle Thicket Studio, barn quilt, barn quilts, barn quilt directions, how to paint a barn quilt
Using the grid pattern, I lightly drew my pattern onto my primed barn quilt board. Using a good painter's tape, I started taping off the sections by color. I painted over the tape with my white primer first to seal the tape off. If any paint was to bleed under the tape, it would be the same white as the background and not show.

Thistle Thicket Studio, barn quilt, barn quilts, barn quilt directions, how to paint a barn quilt
Then I painted two coats of color in the sections. Sometimes you are able to mask all sections of one color, but most of the time you will have to wait for one section to dry before you can tape an adjoining section.

Once I had finished painting my design, I touched up any spots where my pencil mark showed and allowed the paint to completely dry for a few days. Then I painted two coats of a clear non-yellowing polyurethane over all the surfaces of my quilt board and frame boards. I chose to leave my frame boards white, but if you want to paint them a color, paint them before applying the polyurethane. I attached the frame boards using a nail gun and then applied two more coats of polyurethane over all the surfaces.

Thistle Thicket Studio, barn quilt, barn quilts, barn quilt instructions
The hubby helped me hang my barn quilt this past weekend (be sure to use non-rusting screws). And I love it! I bought two more barn quilt board kits and now I can't wait until after Thanksgiving to get them painted and hung too! Hopefully, it won't take as long to get them done and hung as it did the first one!
Thistle Thicket Studio, barn quilt, barn quilts, flying swallows barn quilt, barn quilt instructions

~Sharla

http://www.thistlethicketstudio.com/2016/11/joining-barn-quilt-craze-diy.html