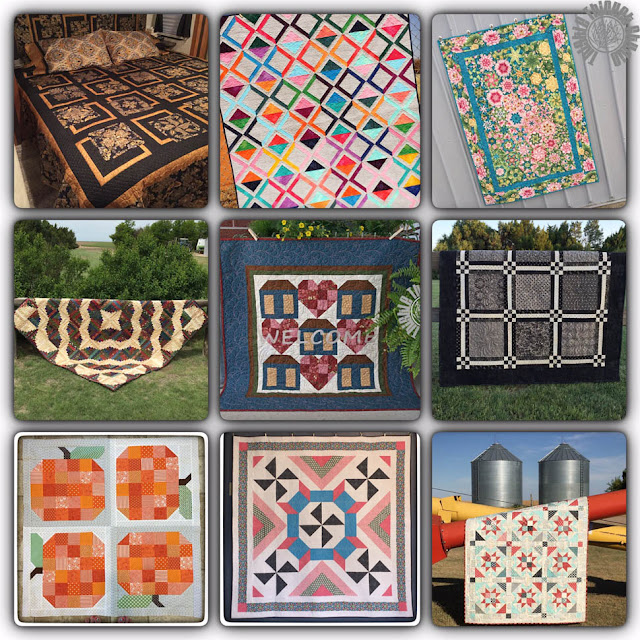
This past week there has been a new hashtag popping up on Instagram called #2015bestnine. It features the top 9 most liked posts on your IG feed in 2015. When I did mine, most of them were WIPs such as blocks from the Farm Girl Vintage Sew Along. But I wanted to showcase my top finished projects for 2015 so I decided to start my own hashtag - #2015bestquiltfinishes - and show off some of the quilts I completed this past year. I really didn't even think I had 9 finishes to showcase, especially since I haven't sewn a thing on my machine since the middle of October! But I was pleasantly surprised that I had a few more, Yay! So here is my favorite top nine quilt finishes for 2015....
FYI - These are listed in chronological order.
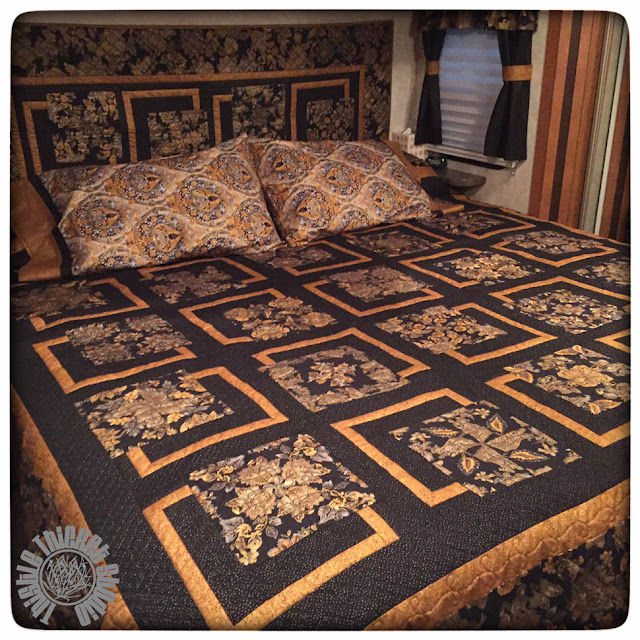
#1. Stack 'n Whack in BQ
My camper quilt. When we bought our new 5th wheel camper it had the ugliest comforter on the bed. It had to go! I found this beautiful black and metallic gold fabric (Grandeur by Robert Kaufman) that was screaming to dress up my home-away-from-home. I ended up making stack 'n whack 4-patch blocks and using them in the BQ pattern by Maple Island Quilts. I made a matching 'headboard' quilt, pillow cases, and curtains to match. It really makes my camper bedroom look classy! I still have more fabric and some day I may make some throw pillows and a mini table runner for the dresser.
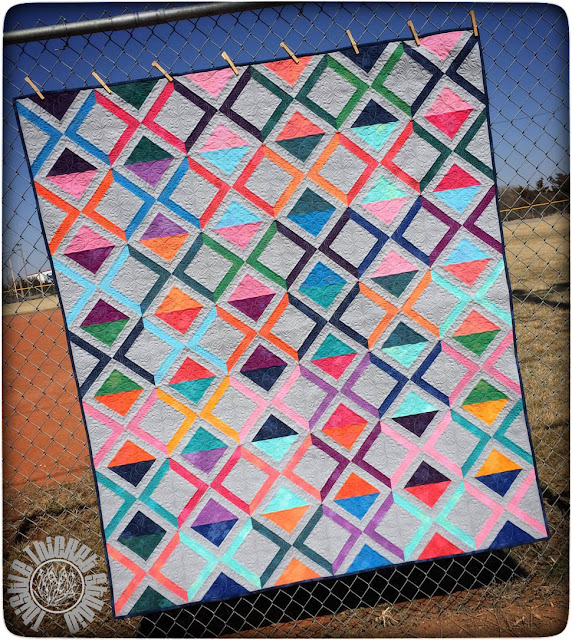
#2. Chainlinks Quilt
This quilt represents my top quilting accomplishment in 2015 - I became a Moda Bake Shop Chef! I love how this quilt turned out (using Moda Grunge and Silver Bella Solids Layer Cakes) and the flexibility of creating a different look by rotating the center 4-patch, as I did in this prototype quilt called Layer Cake Lattice:
I'm excited for the new opportunity I have to work with Moda Bake Shop in 2016! I can't wait to share all the details with you in the coming weeks!
#3. Dance of the Water Lilies Quilt
This was my first attempt at the infamous One Block Wonder Quilt. I loved this fabric and thought it turned out beautifully. Of course, as I was making this quilt, I saw the potential for beautiful OBW quilts in all sorts of fabrics and bought several. Maybe I'll put another OBW on my list of goals for 2016.
#4. Curvy Log Cabin Quilt
This quilt started out as a quilt guild challenge in 2014 but I didn't get it finished until May of this year. This was a scrappy quilt using my darker color scraps. I loved this quilt and ended up gifting it to my niece for her wedding. I even made a cute heart-shaped log cabin label for the back.
#5. The Ooops Quilt
I affectionately named this quilt the Ooops Quilt because I had a brain fart while quilting it and ended up putting in the wrong size for the length. I didn't realize until I had already quilted a row and I didn't have time to rip it out. So, I ended up leaving a space in the center to adjust for my mistake and quilting the outline of the word 'welcome'. The quilt turned out fine, but I didn't like the quilted 'welcome' in the middle because it didn't show up. So, then I decided to try my hand at thread painting and I filled in the letters to make it stand out. I'm pretty proud of my recovery! This was a quilt top that I had made about 5 years ago and was in my UFO pile. I didn't get many UFOs completed this year, but this one is finally done and off the list.
#6. Little Black Dress II Quilt
When my mom and I got our new quilting machine in May, we needed some smaller quilt tops to practice on. I made this to coordinate with a Turning Twenty quilt I made for my bedroom last year using Little Black Dress I. It now covers the bedside table.
#7. Pumpkin Quilt
This little quilt represents all of the fun I had as a featured blogger for Lori Holt's (Bee In My Bonnet) Farm Girl Vintage Sew Along and all the fun I had sewing each of the blocks. I didn't have orange in my fabric stash to make the pumpkin block so I had to collect them. I fell in love with the orange (and had to use more than a 2 1/2" square out of those FQs) so I made four extra pumpkin blocks and made a table topper. I've already snagged a fat quarter bundle of Lori's Modern Minis and I'm looking forward to Lori's new Bloom sew along starting in January! And yes, I still need to finish my Farm Girl Vintage quilt - I'm working on an awesome backing design that I'll be sharing in 2016!
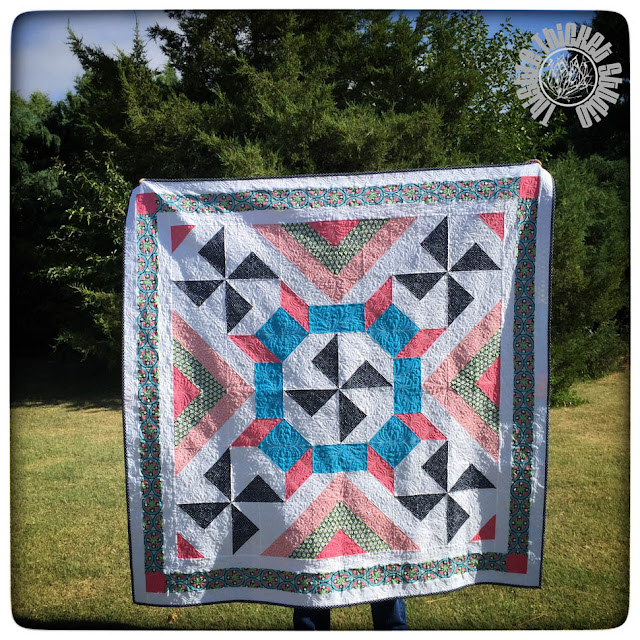
#8. Thistle Thicket Crossing Quilt
This year I participated in the 2015 New Quilt Bloggers group. From that association, I was invited to design a quilt block for FabriQuilt. The free block pattern was shared in a blog hop at the end of August. I designed a couple of similar patterns because this pattern ended up using more background fabric than was supplied by FabriQuilt. So, I decided to make a big block quilt with it by enlarging the block pattern and I shared the pattern on my blog. This isn't the best photo, but I do love how it shows all the custom quilting I did on this quilt.
#9. Water Turn Quilt
As I mentioned before, I was a featured blogger on Lori Holt's Farm Girl Vintage Sew Along this year. My block was the Water Turn block and I decided to make a quilt from her block and add a 4-patch in the center - Lori calls that a 'mash up' block. I used Sweetwater's Feed Company fabric because I thought it fit with the whole farm girl theme of the sew along and also fit my life as a farm girl. And I loved how this photo of the quilt turned out with the quilt draped on a grain auger with the grain bins in the background!
Well, there it is. My #2015BestQuiltFinishes. Are you on Instagram? I invite you to share your best quilt finishes on IG and use this hashtag. I would love to see lots of posts so everyone can enjoy your best finishes too!
Wishing you a very Happy, Health and Quilty New Year!
~Sharla
Thursday, December 31, 2015
Wednesday, December 30, 2015
A Texas-Sized Barn Wood Clock Tutorial & Other Handmade Gifts
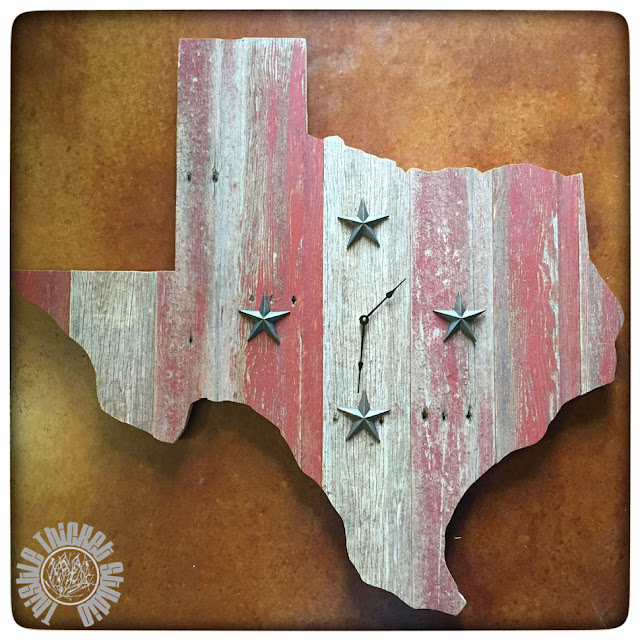
Now that Christmas has passed and the gifts are all opened, I thought I'd share what I have been up to lately. In the three weeks from the time we arrived home after Thanksgiving from our extended travels this fall to the time we left again for the Christmas holiday, I managed to decorate for Christmas (although no one has seen our home decked out except for the hubby and I) and make a few Christmas gifts. My biggest endeavor (with a lot of help from the hubby) was making a Texas-shaped clock from barn wood for our daughter.
It turned out so awesome that I thought I'd share a few photos of the process. I had determined that I wanted the clock to be 3 feet tall so a drew a grid in Microsoft Publisher that was 13 squares by 13 squares. The lines on the grid were spaced at 1/2" intervals. Each square on the grid represents 3". I found a photo of the outline of Texas and placed it over the grid, enlarging it to fit my grid.
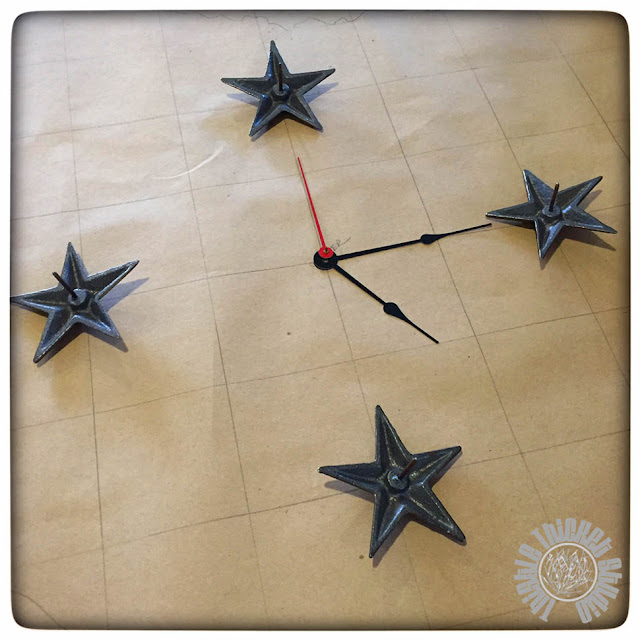
Next, I drew out my 13 square by 13 square grid on brown craft paper. The lines of the grid were spaced 3" apart. Then, using the outlined shape that I printed on the grid for a pattern, I drew out the shape of Texas, one square at a time. By breaking down the outline into 3" segments, it was really easy to draw an accurate Texas shape. After the shape was drawn, I laid out my clock parts on the grid and marked where I wanted them to be placed. I purchased a clock kit at Hobby Lobby and found the Texas stars at the Fredricksburg Trade Days, but they are readily available at a wide variety of places.
After cutting out my Texas shape from the craft paper, I was ready to transfer it to wood. I used an old piece of paneling for the backing of the clock. I laid out the pattern, wrong side up, and traced the pattern onto the paneling.
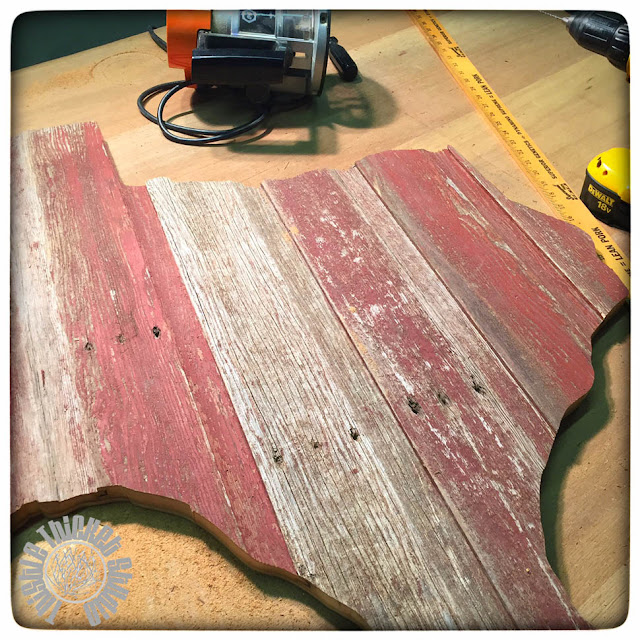
To make it more manageable, we cut the paneling down smaller by cutting all the way around my Texas shape approximately 3" outside my drawn lines. We (this is where the hubby started helping me) determined where we wanted the center piece of barn wood to be placed on the paneling, making sure that there was adequately sized pieces around all the edges. You don't want to end up with a sliver of wood on the edge that will be to small to attach or that will break off easily. After we determined where the center board would be placed, we drew a straight line vertically as a guide to line up that first board and clamped it in place. Then we screwed the board into place from the back paneling side. From there, we worked out from the center attaching the boards to the paneling from the back. The barn wood we used was tongue and groove boards so the boards fit together nice and snug. As you can see in the photo, we cut the boards just long enough to extend beyond the edge of the paneling.
Once the barn wood was attached, we flipped the wood over so the paneling was facing up and cut out the Texas shape that I had drawn using a jig saw. By cutting with the back side up, it left a nice clean edge on the front of the barn wood.
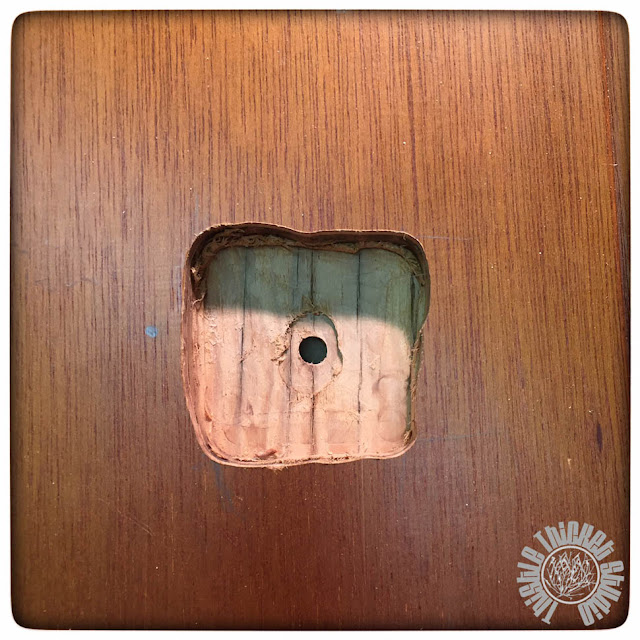
Since the center hub of the clock kit was not long enough to reach from the back of the clock to the front, we had to router a space into the back side of the clock to fit the clock mechanism in. First we drilled the center hole where the clock hands would be positioned, then routered a little at a time, checking the depth after each pass until we had it deep enough. I know it's not the prettiest routering job but it worked and no one will ever see what the back side looks like (thank goodness!).
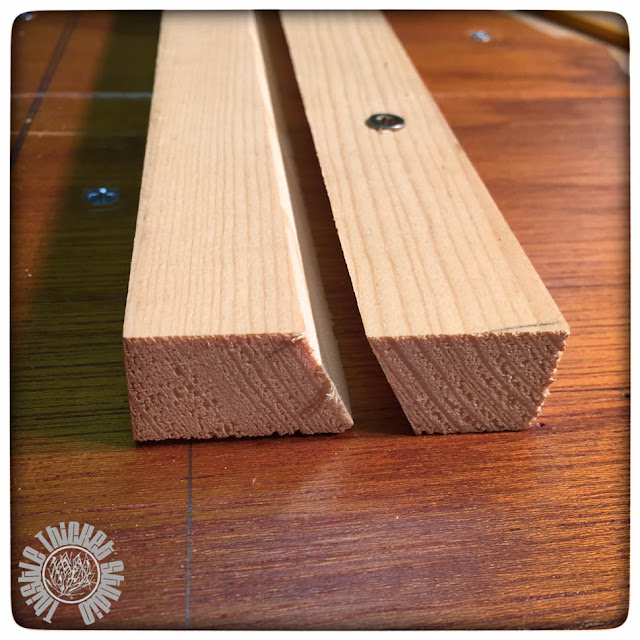
Lastly, we made a hanging cleaver bracket for the back by cutting a 1" x 3" board in half at a 30 degree angle. One half was attached to the back side of the clock and the other half was attached to the wall when we hung the clock. The clock then just rests on the bracket. Another 1" x 3" piece of board was attached on the backside of the clock toward the bottom so that the clock would hang parallel to the wall.
The last step was to attach the stars and clock hands to the front. Using the template pattern, I marked the location where each star would be nailed. Ta-Da! One Texas-sized barn wood clock for our Texas girl! It was so fun to see her face when we gave it to her. She was so excited!
I also found time to make my SILs and nieces vintage button and typewriter key necklaces. Each necklace had the typewriter key of the initial of their first name. Unfortunately, I only got a photo of one of the necklaces.
I also found this cute little vintage pig planter while antiquing this fall and turned him into a pincushion for my mom who collects pigs. I added a hexie flower made from 3/4" hexagons to the pincushion. Isn't he so cute!
I didn't get all of my Christmas projects completed though. Another present for my mom - a vintage Singer featherweight sewing machine folding table - still has to be refinished but the temperatures and time just didn't cooperate to get it finished before Christmas. I'll share how I refinish it in a future post, so stay tuned!
What handmade Christmas gifts did you make this year? Please share, I'd love to hear!
~Sharla
It turned out so awesome that I thought I'd share a few photos of the process. I had determined that I wanted the clock to be 3 feet tall so a drew a grid in Microsoft Publisher that was 13 squares by 13 squares. The lines on the grid were spaced at 1/2" intervals. Each square on the grid represents 3". I found a photo of the outline of Texas and placed it over the grid, enlarging it to fit my grid.
Next, I drew out my 13 square by 13 square grid on brown craft paper. The lines of the grid were spaced 3" apart. Then, using the outlined shape that I printed on the grid for a pattern, I drew out the shape of Texas, one square at a time. By breaking down the outline into 3" segments, it was really easy to draw an accurate Texas shape. After the shape was drawn, I laid out my clock parts on the grid and marked where I wanted them to be placed. I purchased a clock kit at Hobby Lobby and found the Texas stars at the Fredricksburg Trade Days, but they are readily available at a wide variety of places.
To make it more manageable, we cut the paneling down smaller by cutting all the way around my Texas shape approximately 3" outside my drawn lines. We (this is where the hubby started helping me) determined where we wanted the center piece of barn wood to be placed on the paneling, making sure that there was adequately sized pieces around all the edges. You don't want to end up with a sliver of wood on the edge that will be to small to attach or that will break off easily. After we determined where the center board would be placed, we drew a straight line vertically as a guide to line up that first board and clamped it in place. Then we screwed the board into place from the back paneling side. From there, we worked out from the center attaching the boards to the paneling from the back. The barn wood we used was tongue and groove boards so the boards fit together nice and snug. As you can see in the photo, we cut the boards just long enough to extend beyond the edge of the paneling.
Once the barn wood was attached, we flipped the wood over so the paneling was facing up and cut out the Texas shape that I had drawn using a jig saw. By cutting with the back side up, it left a nice clean edge on the front of the barn wood.
Since the center hub of the clock kit was not long enough to reach from the back of the clock to the front, we had to router a space into the back side of the clock to fit the clock mechanism in. First we drilled the center hole where the clock hands would be positioned, then routered a little at a time, checking the depth after each pass until we had it deep enough. I know it's not the prettiest routering job but it worked and no one will ever see what the back side looks like (thank goodness!).
Lastly, we made a hanging cleaver bracket for the back by cutting a 1" x 3" board in half at a 30 degree angle. One half was attached to the back side of the clock and the other half was attached to the wall when we hung the clock. The clock then just rests on the bracket. Another 1" x 3" piece of board was attached on the backside of the clock toward the bottom so that the clock would hang parallel to the wall.
The last step was to attach the stars and clock hands to the front. Using the template pattern, I marked the location where each star would be nailed. Ta-Da! One Texas-sized barn wood clock for our Texas girl! It was so fun to see her face when we gave it to her. She was so excited!
I also found time to make my SILs and nieces vintage button and typewriter key necklaces. Each necklace had the typewriter key of the initial of their first name. Unfortunately, I only got a photo of one of the necklaces.
I also found this cute little vintage pig planter while antiquing this fall and turned him into a pincushion for my mom who collects pigs. I added a hexie flower made from 3/4" hexagons to the pincushion. Isn't he so cute!
I didn't get all of my Christmas projects completed though. Another present for my mom - a vintage Singer featherweight sewing machine folding table - still has to be refinished but the temperatures and time just didn't cooperate to get it finished before Christmas. I'll share how I refinish it in a future post, so stay tuned!
What handmade Christmas gifts did you make this year? Please share, I'd love to hear!
~Sharla
Thursday, December 24, 2015
Monday, December 21, 2015
Woodsy Joy Banner Tutorial
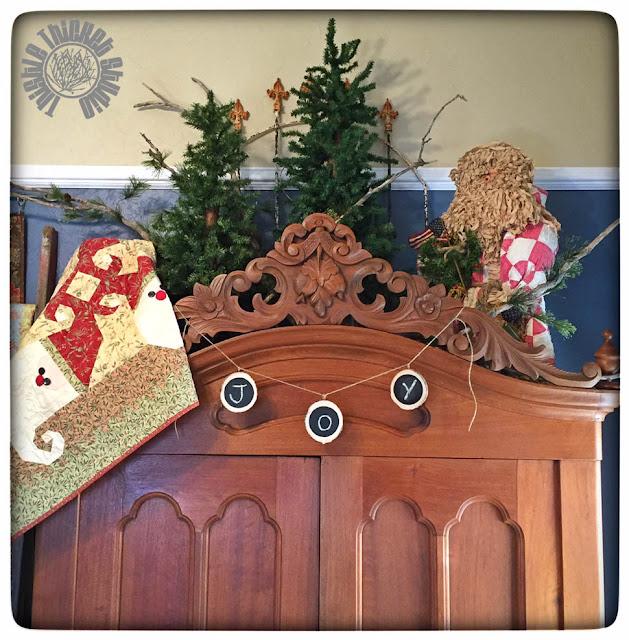
In between baking and candy making, I found a little time to do some last minute crafting this weekend. I had a couple - well, three to be exact - wood slices left after decorating with the bottle brush trees I showed you last week. My brother cut these wood slices and I was lucky enough to receive a few.
I decided to make a woodsy Joy banner with the remaining slices. It was quick and easy - my favorite kind of project!
I drew a circle in the middle of each slice and painted inside the circle using chalkboard paint.
After they dried, I screwed a small eyelet at the top of each slice and strung them on twine, then wrote on them with chalk.
I hung them across the front of our entryway wardrobe. It is the perfect finishing touch to my woodsy Christmas décor.
Wishing y'all a wonderful week as you make final preparations for the merriest of Christmases!
~Sharla
Wednesday, December 16, 2015
Dyed Bottle Brush Trees
Wow! December is half way over and I still haven't touched my sewing machine! I've been way too busy decorating and making gifts for Christmas. One of the things on my to-do list for awhile now has been to bleach and dye some bottle brush trees for part of my decorations. This weekend my mom, sister-in-law and I got together to make some. It was so fun and easy to do, so I thought I'd share how we did it.
We found assortment packages of bottle brush trees in the Christmas Village section at Michaels (and they were 50% off, yea!), but you can find them in most craft and hobby stores.
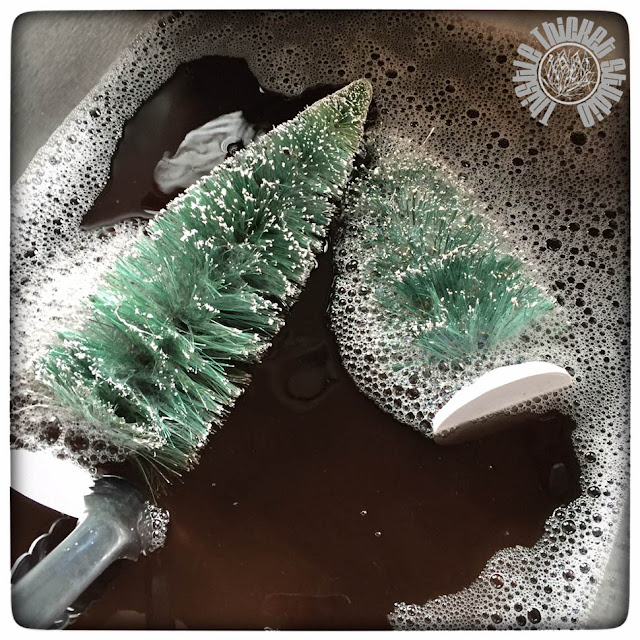
First, the trees need to be bleached to remove their green coloring. We filled the kitchen sink with approximately 4" of hot water and added bleach. We didn't measure how much bleach we put in but it wasn't more than a fourth of a gallon jug. The water will turn dark and dirty as the trees are bleaching. We changed our bleach water after the first initial bleaching and bleached the trees again. We left the trees in the bleach water for 10 - 15 minutes each time and then rinsed them under warm running water.
After our trees dried over night, we decided they still weren't white enough and ended up bleaching them again after test dyeing one tree. The coloring on our test dyed tree was dirty looking and not a bright, pretty color. Some of the trees we pulled out early while there was still a hint of green and didn't dye them (see the tree in the bottom right corner). My sister-in-law decided to not dye her trees because she liked the bleached look so well.
We used Rit liquid dye in fuschia, aquamarine and teal. We filled pint canning jars with hot water and added 1 teaspoon of liquid dye. Unfortunately, the aquamarine and teal colors were too close to the same and you really can't distinguish a difference.
Some of the trees we 'candy corn' striped by dipping one end in the fuschia and the other end in the teal. And some trees we tried an ombre effect by dipping one end of the tree in dye and leaving the other end bleached. I definitely want to find some different colors of dye and add to my forest in the future!
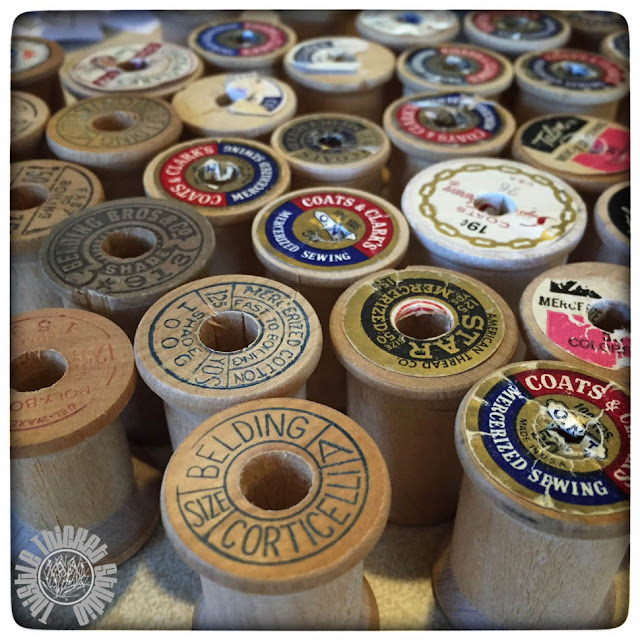
I decided to remove the plastic bases from my trees and hot glued them to old wooden thread spools for a more vintage look.
First, the trees need to be bleached to remove their green coloring. We filled the kitchen sink with approximately 4" of hot water and added bleach. We didn't measure how much bleach we put in but it wasn't more than a fourth of a gallon jug. The water will turn dark and dirty as the trees are bleaching. We changed our bleach water after the first initial bleaching and bleached the trees again. We left the trees in the bleach water for 10 - 15 minutes each time and then rinsed them under warm running water.
After our trees dried over night, we decided they still weren't white enough and ended up bleaching them again after test dyeing one tree. The coloring on our test dyed tree was dirty looking and not a bright, pretty color. Some of the trees we pulled out early while there was still a hint of green and didn't dye them (see the tree in the bottom right corner). My sister-in-law decided to not dye her trees because she liked the bleached look so well.
We used Rit liquid dye in fuschia, aquamarine and teal. We filled pint canning jars with hot water and added 1 teaspoon of liquid dye. Unfortunately, the aquamarine and teal colors were too close to the same and you really can't distinguish a difference.
Some of the trees we 'candy corn' striped by dipping one end in the fuschia and the other end in the teal. And some trees we tried an ombre effect by dipping one end of the tree in dye and leaving the other end bleached. I definitely want to find some different colors of dye and add to my forest in the future!
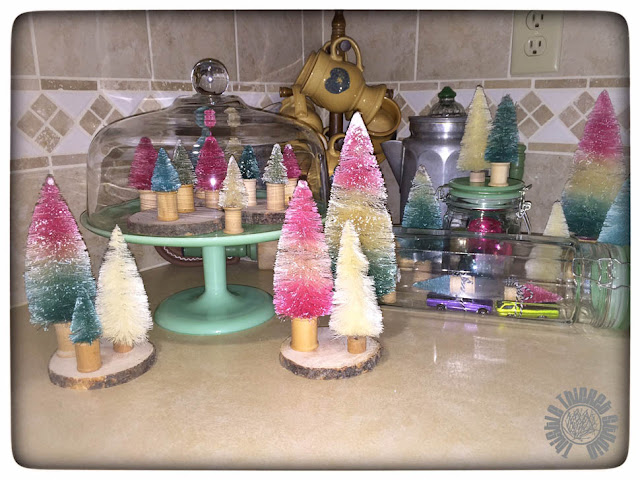
I created a little forest scene in a corner of my kitchen using a jadeite cake plate and new jadeite glass topped jars I found at World Market (love them!).
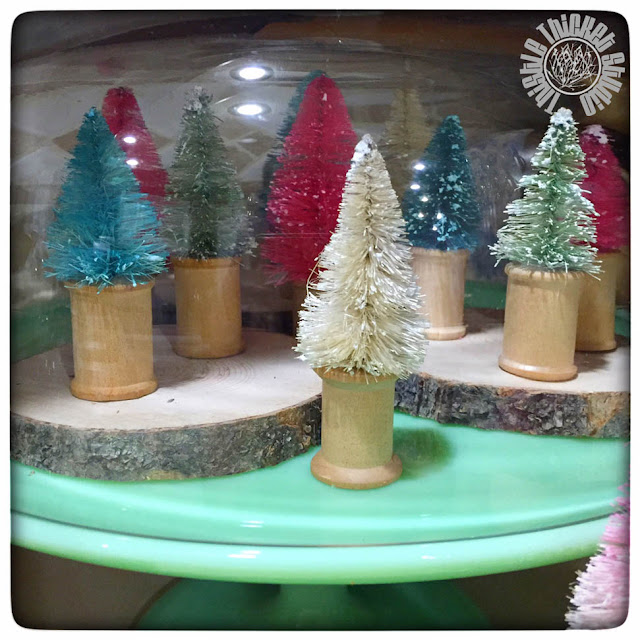
A close up of my trees under glass. Eventually, I may add some decoration to the spools, such as tying jute bows on them or something. Don't you love the slabs of wood my brother cut and gave me?
I laid a jar on its side and added a couple of my hubby's Hot Wheels cars with trees tied to them. So fun and cute!
I saw the cutest star made out of bottle brush trees that is next on my to-do list. They simply took 5 bleached trees and glued the bottoms together in a star shape. A wreath would be cute too. Oh, the ideas are endless! I would love to hear how you would use bleached or dyed bottle brush trees in your décor, so comment away!
~Sharla
Wednesday, December 9, 2015
Collecting Vintage Sewing Notions
I collect lots of different things - vintage Christmas ornaments, jadeite dishes, Droste chocolate tins, toy sewing machines, yardsticks, fabric..... One of my newest collections is vintage advertising needle book cases. I just love the vintage pictures on them - especially the ones with scenes of ladies sewing. I've had one hanging in my sewing room that my mother-in-law gave me several years ago. I started picking one up here & there this year and before I knew it, another collection was born.
With our recent junking travels, my needle book case collection has grown, so today I thought I'd share a couple of photos of them:)
A collection isn't fun unless you can look at them and enjoy them. So, I made display sticks using yardsticks, clothes pins and buttons. I love the look!
I also have some displayed on an old porcelain shelf that my mom gave me. I have it leaning against a cupboard in my sewing room and use button magnets to hold the needle book cases.
Someday I hope to do a little research on needle book cases. It would be fun to know when they were popular and how old they are. Do you collect any vintage sewing notions? How do you display them?
~Sharla
Saturday, December 5, 2015
Vintage Ornament Wreath Tutorial
I love Christmas. I love decorating for Christmas. I always have more ideas than I have time and this year is no different. I have so many things I want to do and won't get a fraction of them done. But one of the things at the top of my list this year was to get out all of my vintage ornaments and decorate with them this year. I've seen some wonderfully beautiful vintage ornament wreaths on Instagram and I wanted to make one for myself. So, yesterday I did it and I'm so happy I did! I love it!
I wasn't sure I would have enough ornaments for a wreath and still decorate a tree too, so I picked up a few things while on our vacation in November. I scored big with a box of vintage ornaments at an estate sale. My favorite ornaments in the box were these wire wrapped ornaments, which were too neat to glue to a wreath, so they'll grace my tree instead.
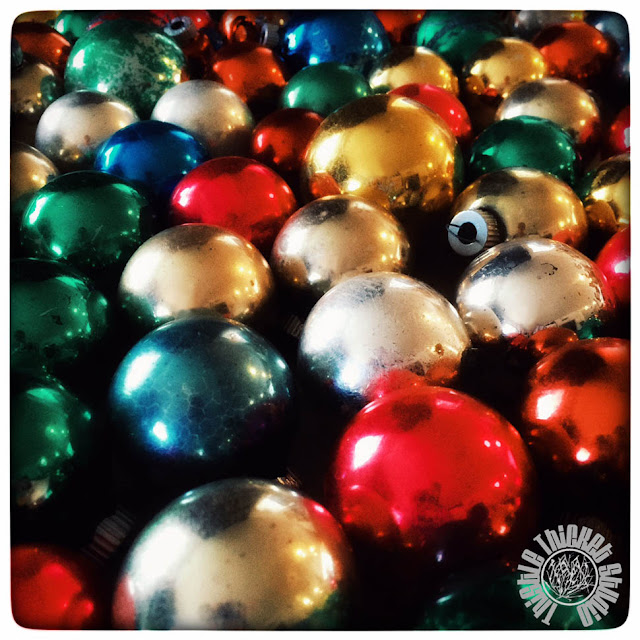
I didn't have to worry about not having enough ornaments though. I had forgotten how many I had. I just love vintage ornaments, especially Shiny Brites.
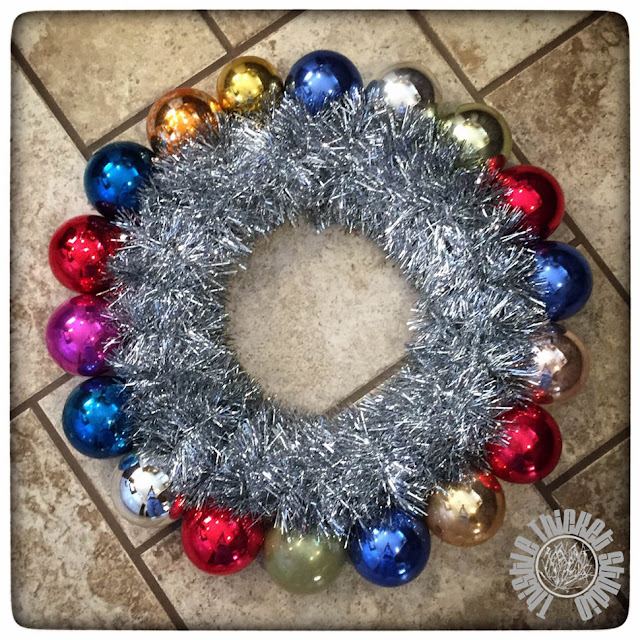
It was so fun making this wreath that I thought I'd share how I made mine. I started with a 12" foam wreath form and tinsel garland. I used one 15' package of garland, but if you use a bigger wreath form you'll need another package.
First, I made a hook for hanging. I used a sturdy piece of floral wire, folding it in half and twisting a loop in it. Then I wrapped it around the wreath form tightly to secure it.
Next, I wrapped the garland around the wreath form, securing the ends with hot glue. Sorry, I forgot to take a photo after I wrapped the wreath, but you can see how it looks in one of the photos below.
I gathered up my ornaments. I used round ball ornaments in small, medium and large sizes. I also had a variety of focal ornaments too. It takes a lot. I used 125-150 ornaments in my wreath.
I just love this photo. The colors look so rich.
Next, I glued large round ball ornaments around the outside edge of the wreath. I used a variety of colors but they were all the same size (well except for one, which was a little smaller because I couldn't fit the last ball in the remaining space). I used an ample amount of hot glue to secure the ornaments. I used 18 ornaments around the outside edge. The larger the balls used in this outer row of ornaments, the larger the finished wreath will be. My wreath ended up being 17" across. You can also see here how the wreath form looks wrapped with the tinsel garland.
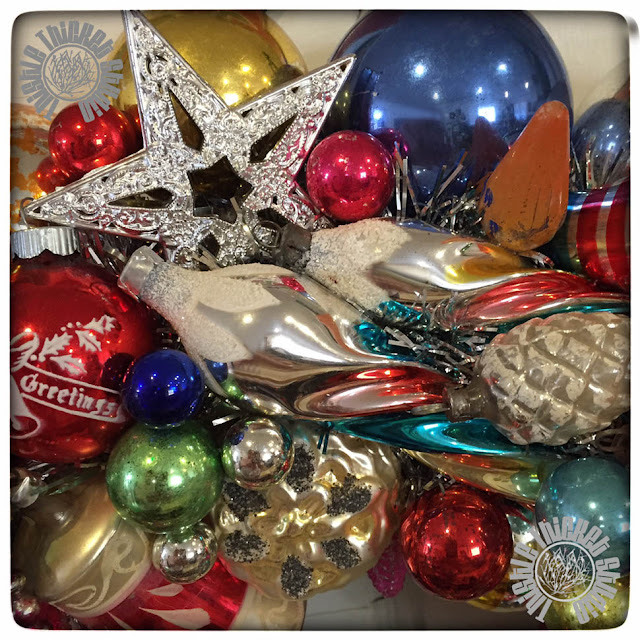
Now came the fun part. I started adding my focal ornaments on the top. I grouped some ornaments that were similar together, like these two birds.
I placed the larger focal ornaments first, filling in with medium-sized balls around the focal ornaments. Lastly, I filled the small gaps with small balls and old Christmas light bulbs. A little tinsel peeked through, which I like.
Isn't this vintage Santa so cute?
I think the more variety of shapes of the ornaments, the more interesting the wreath will be.
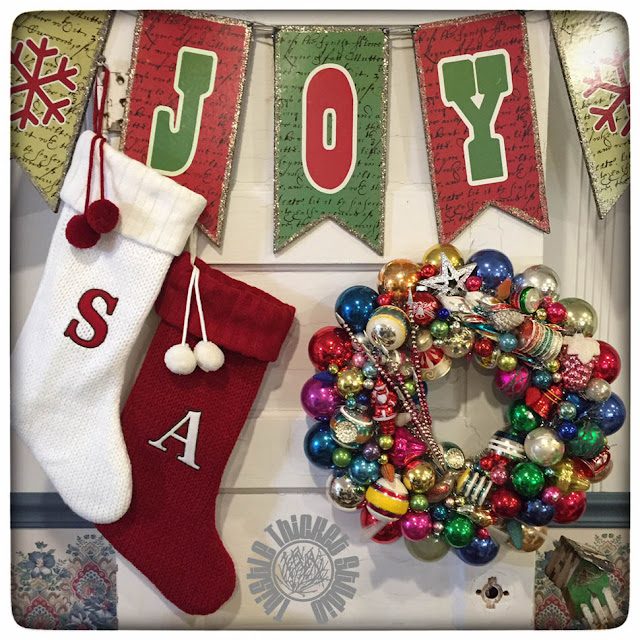
I hung my wreath on an old door that I found at a garage sale while on vacation, along with stockings and a metal joy banner. Once I get the rest of this area of my living room decorated, I'll share more photos. I had hoped to have it finished tonight but I ran out of ornaments hooks so couldn't finish decorating my vintage ornament tree:(
Do you collect vintage ornaments? Tell me about your collection and how you decorate for Christmas with them! And if you make a vintage ornament wreath, please share a photo.
Wishing you a homemade, vintage kind of Christmas!
~Sharla
I wasn't sure I would have enough ornaments for a wreath and still decorate a tree too, so I picked up a few things while on our vacation in November. I scored big with a box of vintage ornaments at an estate sale. My favorite ornaments in the box were these wire wrapped ornaments, which were too neat to glue to a wreath, so they'll grace my tree instead.
I didn't have to worry about not having enough ornaments though. I had forgotten how many I had. I just love vintage ornaments, especially Shiny Brites.
I gathered up my ornaments. I used round ball ornaments in small, medium and large sizes. I also had a variety of focal ornaments too. It takes a lot. I used 125-150 ornaments in my wreath.
I just love this photo. The colors look so rich.
Next, I glued large round ball ornaments around the outside edge of the wreath. I used a variety of colors but they were all the same size (well except for one, which was a little smaller because I couldn't fit the last ball in the remaining space). I used an ample amount of hot glue to secure the ornaments. I used 18 ornaments around the outside edge. The larger the balls used in this outer row of ornaments, the larger the finished wreath will be. My wreath ended up being 17" across. You can also see here how the wreath form looks wrapped with the tinsel garland.
Now came the fun part. I started adding my focal ornaments on the top. I grouped some ornaments that were similar together, like these two birds.
I placed the larger focal ornaments first, filling in with medium-sized balls around the focal ornaments. Lastly, I filled the small gaps with small balls and old Christmas light bulbs. A little tinsel peeked through, which I like.
Isn't this vintage Santa so cute?
I think the more variety of shapes of the ornaments, the more interesting the wreath will be.
I hung my wreath on an old door that I found at a garage sale while on vacation, along with stockings and a metal joy banner. Once I get the rest of this area of my living room decorated, I'll share more photos. I had hoped to have it finished tonight but I ran out of ornaments hooks so couldn't finish decorating my vintage ornament tree:(
Do you collect vintage ornaments? Tell me about your collection and how you decorate for Christmas with them! And if you make a vintage ornament wreath, please share a photo.
Wishing you a homemade, vintage kind of Christmas!
~Sharla
Subscribe to:
Comments (Atom)

